This guide explains how to install the Senso client on a macOS device.*
*Please read all documentation provided before installation to prepare devices for deployment and to check permissions and supported architecture.
Supported operating systems
Mojave/10.14+
Supported architectures
The Senso macOS client supports x84_x64 and ARM (Apple Silicone e.g. M1) architectures.
Rosetta is an Apple required application and is auto prompted on installation of Senso macOS Client.
Downloading the Senso client
1. Right click the package and click ‘Save to downloads folder’.
2. Go to Finder and find the downloads folder.
3. Right click the installer and select open.
4. You will hit the pop-up screen above, click ‘Open’


Installation through the installer
Once you select open, the installer will open, and you will be faced with the screen seen below.

1. Complete the license agreement.
2. You will be prompted for administrator credentials.
3. The installer will run.

4. If it ran successfully, you will see the message below
5. If the installer is unsuccessful for any reason, please ensure that the account used to install has admin
credentials.

Post-Installation
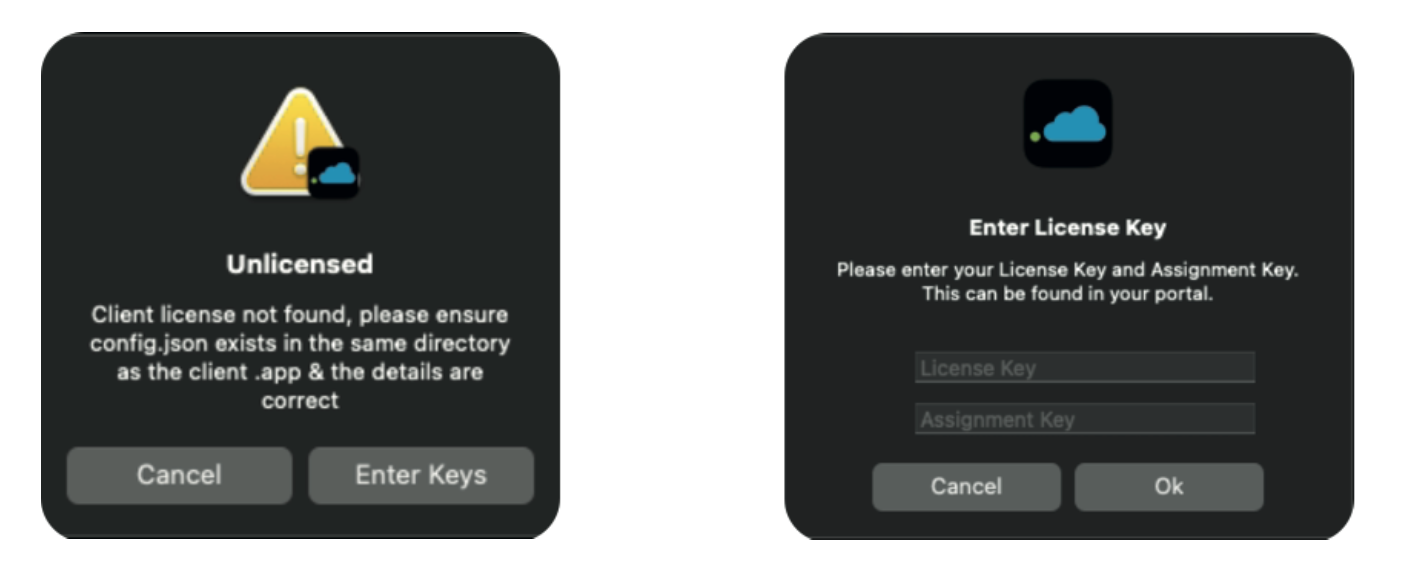
When mass deploying the Senso macOS Client, there are three options to edit the config.json, which contains your License and Assignment key.
The First Option: As soon as the Senso Client is installed, you should see the Senso logo in the top navigation bar.


The Second Option: Within the Senso folder (found at Library>Renato Software>Senso Client>config.json) right click the config.json file, select open with TextEdit and change the values within the file to match your License and Assignment keys.
The Third Option:
Through the terminal you can use the following command to replace the License and Assignment Keys in the config.json file.
echo '{"LicenseKey": "Enter_License_Key",\n "AssignmentKey":"Enter_Assignment_Key"}' > /path/to/config.json
Where the above path states "Enter_License_Key" and "Enter_Assignment_Key" replace with your own License and Assignment keys and after the '>' replace with the path to the config.json file.
A quick method to find this path is to drag the config.json file into the terminal and the it will print out the path to the file
If the details you entered were correct, click the client (this may take a minute or so). The connection status will change to connected and within your portal, and your device will appear.

You can also verify that the product has been installed by opening a Finder Window and navigating
to:
/Library/Renato Software/Senso client
The directory should contain the Senso client, the config.json file, the documentation file and the script file.

The client runs as a service and once it has been downloaded it will start running. To calibrate correctly to the account, once the client has been installed and it has been connected to the portal, please restart the machine.
Uninstall the client
To uninstall the client, run the following commands in the terminal:
- launchctl unload /Library/LaunchAgents/sensoclient.app.LaunchAgent.plist
This should remove the Senso logo from your devices navigation bar:
- sudo sh /Library/Application\ Support/Renato\ Software/Senso\ Client/Scripts/uninstall.sh
Once the command has been run, you will be prompted for administrator credentials.
If your account does not have the required privileges to run elevated commands, you will need to run terminal as a user with elevated privileges and try again.
The uninstaller will run and output a success message when finished.

If the uninstaller is unable to run, you can manually uninstall the client by performing the following steps:
1. Remove all permissions for the app:
2. Delete the following directories and all-sub directories / content
• /Library/Renato\ Software
• rm /Library/Renato\ Software
• /Library/Application\ Support/Renato\ Software
• rm /Library/Application\ Support/Renato\ Software
3. Remove the installation record from pkgutil:
• sudo pkgutil-forget “com.renatosoftware.SensoMacClient”
All of these must be performed using elevated credentials otherwise the client may not install correctly the next time you come to install it on this machine.
