If you have students who take school owned devices home but wish to have control over the devices so they are not being used at unacceptable times, this guide will show you how to create a policy that will stop the students from being able to gain access to the internet at a set time.
Please note - This module would allow you to create multiple 'bedtime schedules' that are age appropriate for different groups of pupils. For example you may want to set different times for each Key stage.
Once you have logged in to your console, select the group that you wish to apply the policy against. For this example, ‘IT Room 2’ has been selected.
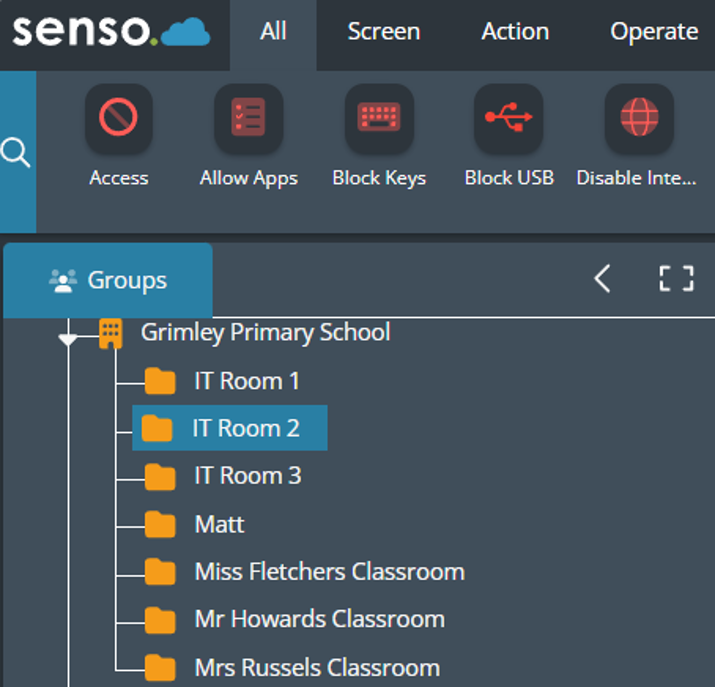
Any devices that are associated with this group will be part of the new policy.
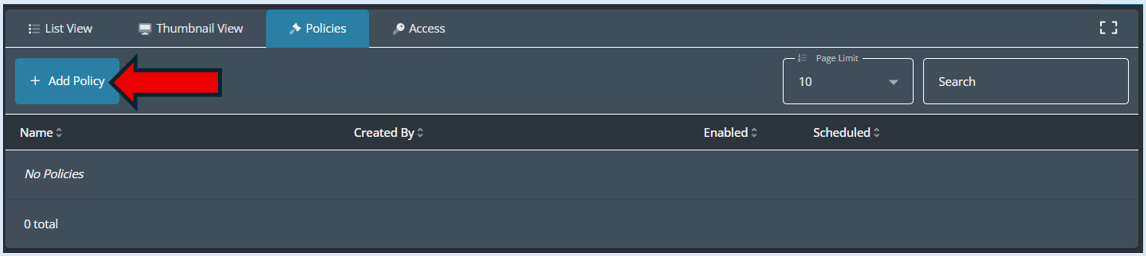
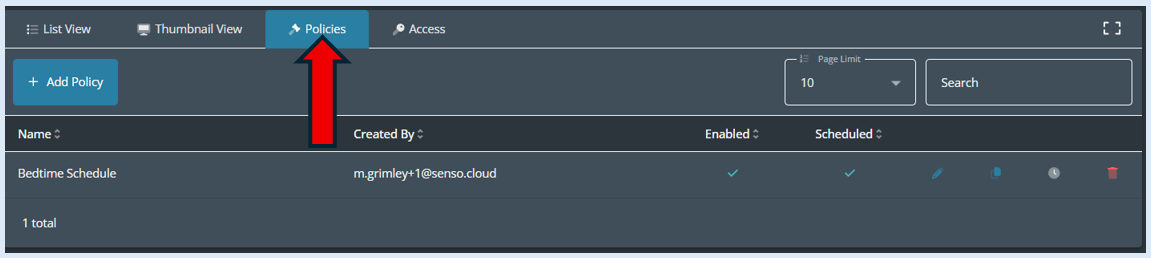
Select the ‘Policies’ icon.

Select ‘Add Policy’.
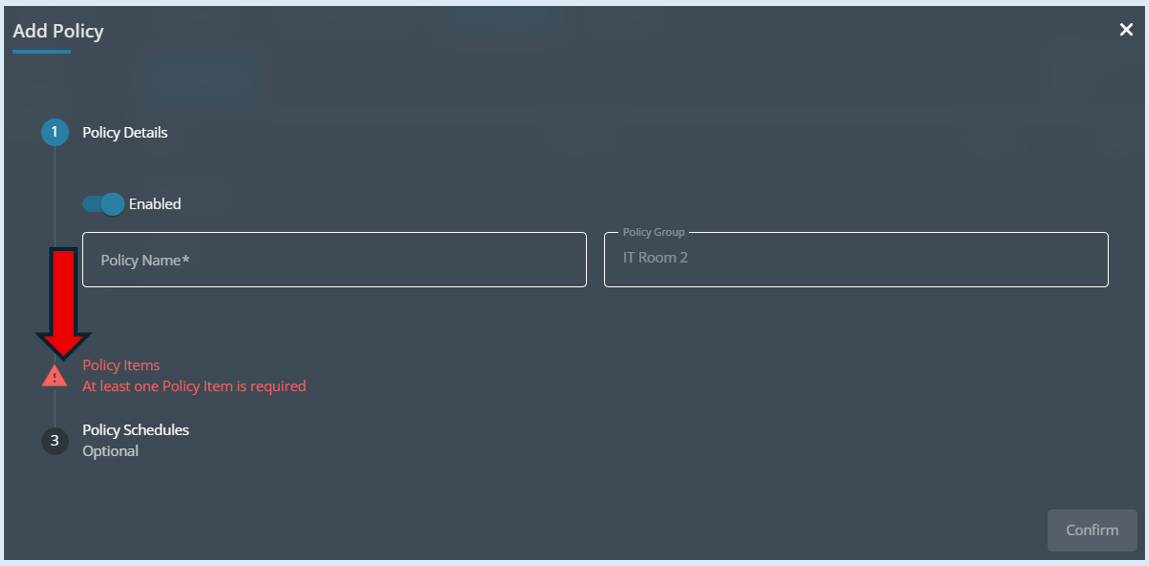
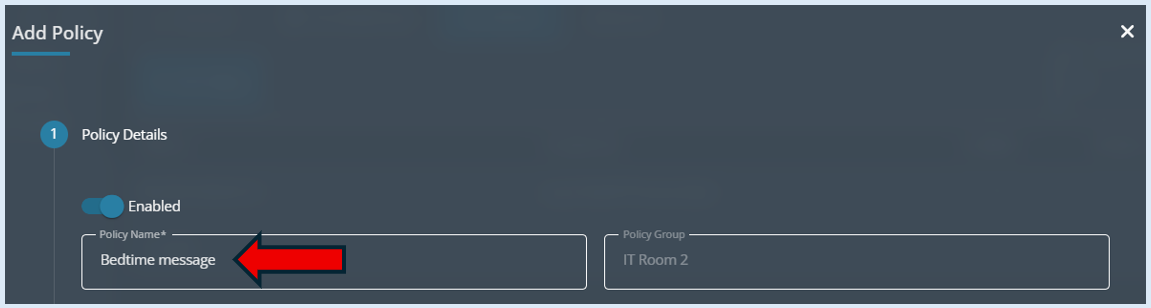
As a default the Policy will be set to ‘Enabled’.
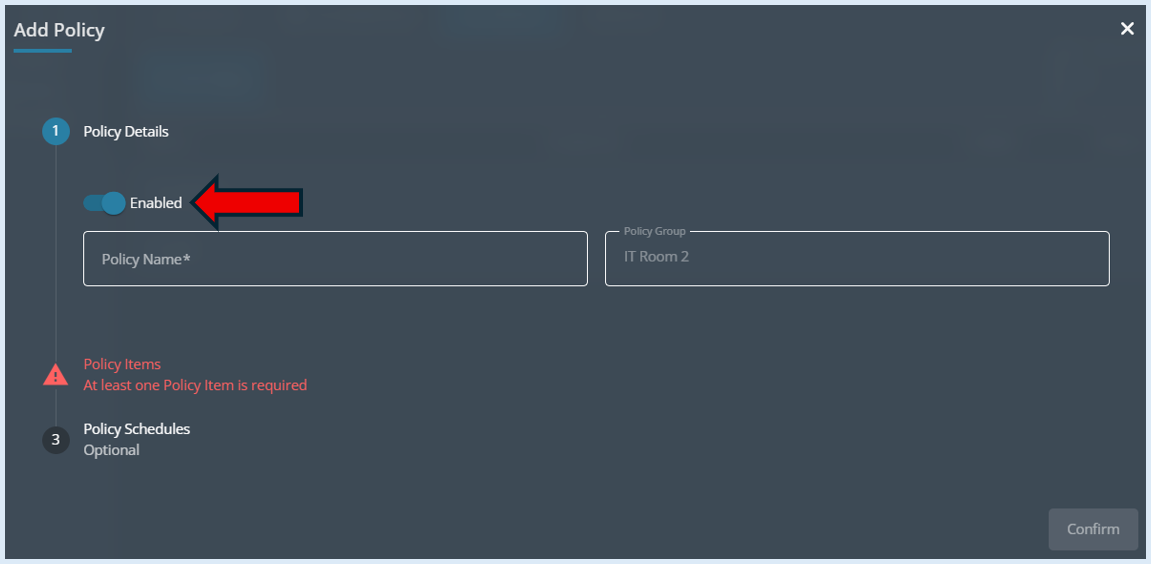
You can then add in a name for the policy.
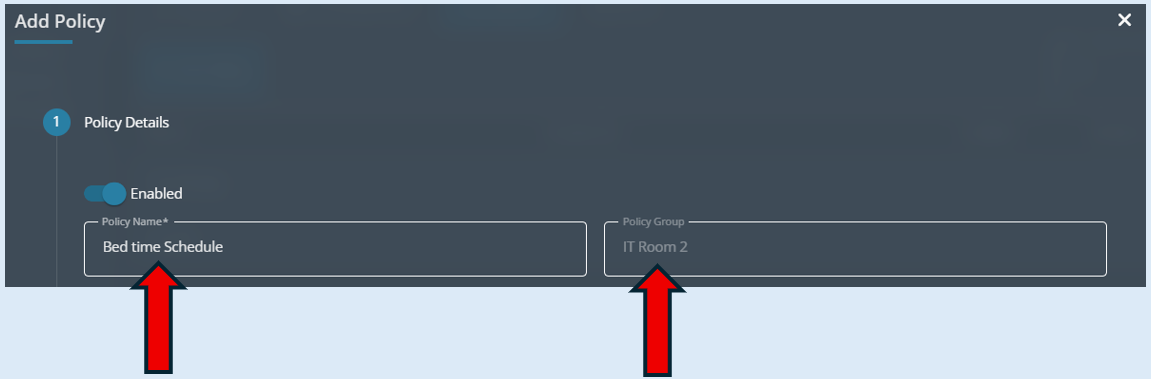
The Policy group field will automatically populate with the name of the group initially selected at the start of this process.
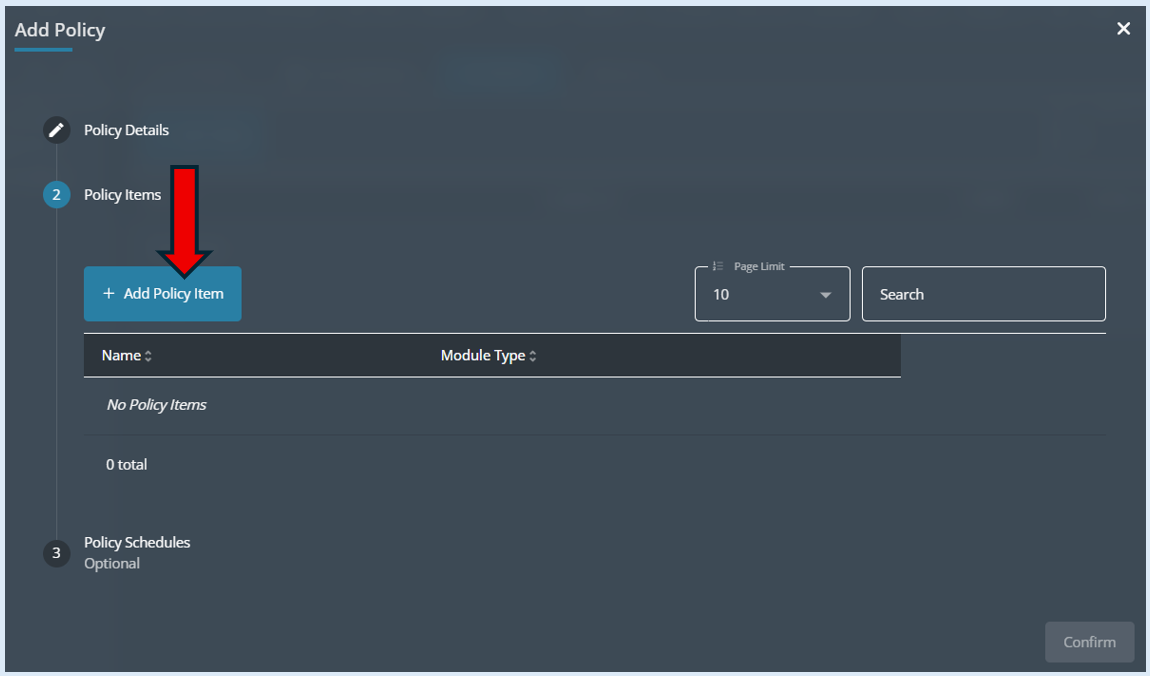
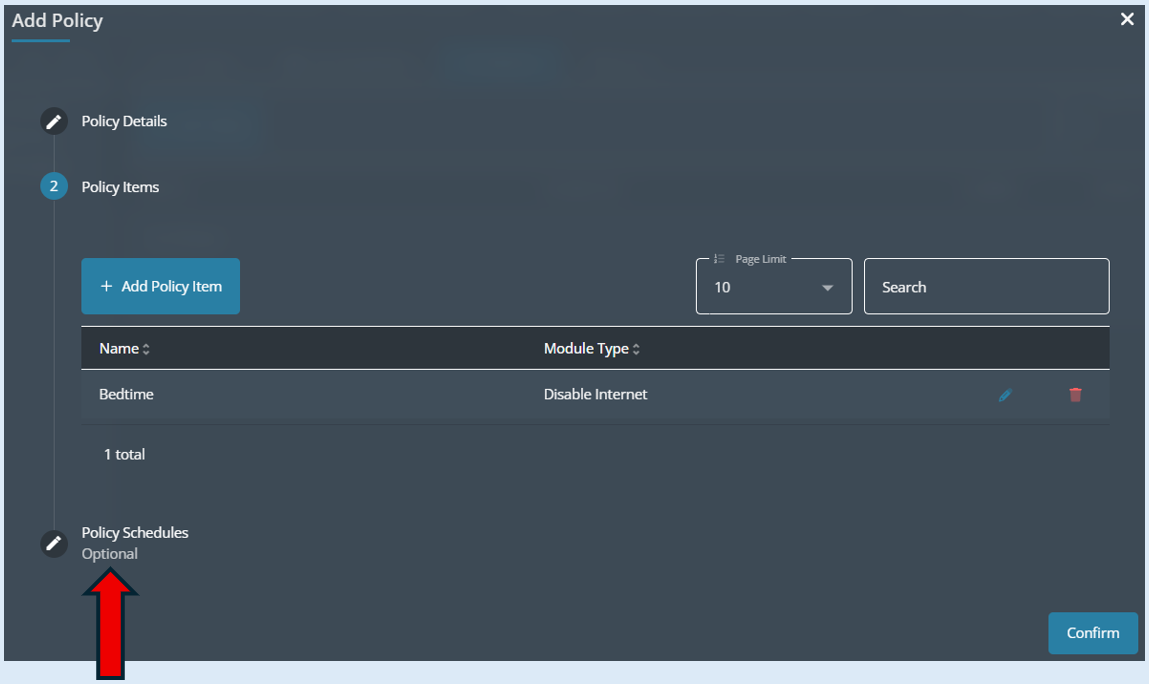
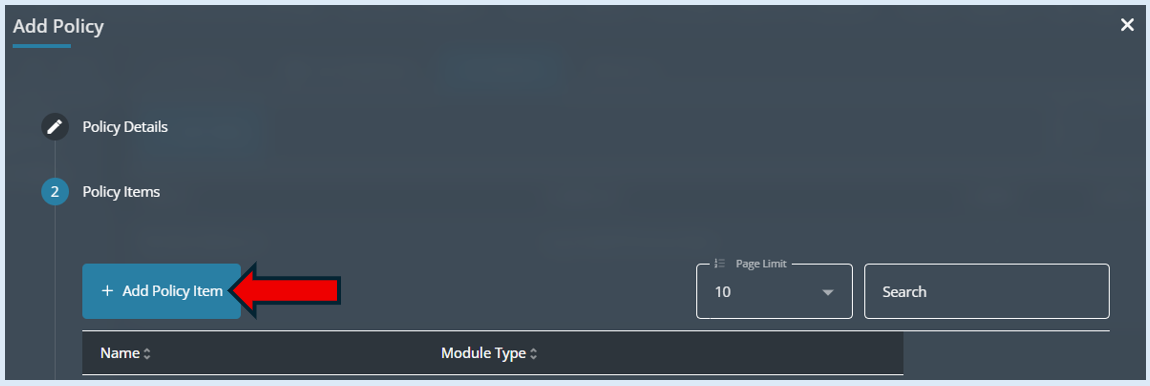
Next click on the ‘Policy Items’ icon.
You now need to click on ‘Add Policy Item’.
Add in a name in the ‘Name’ field.
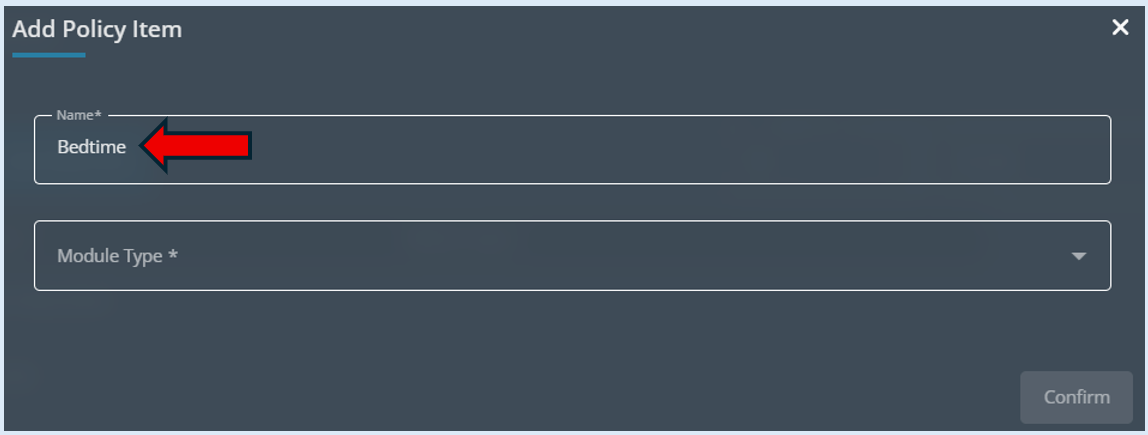
In the ‘Module Type’ field click the dropdown arrow and select ‘Disable Internet’.
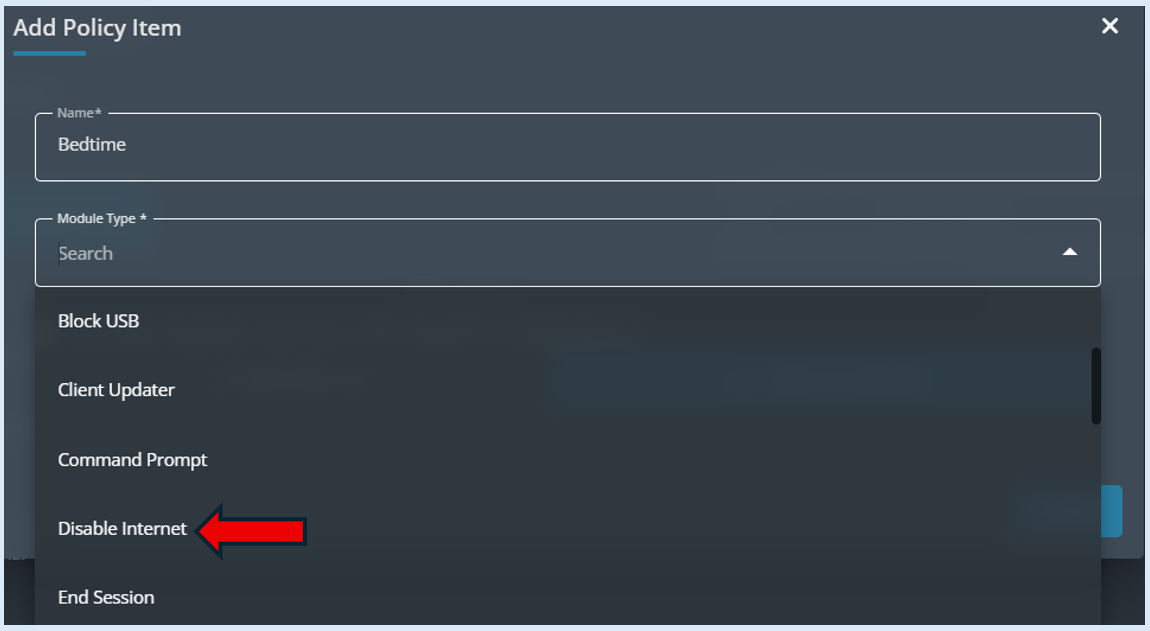
Select the ‘Disable Internet’ button.
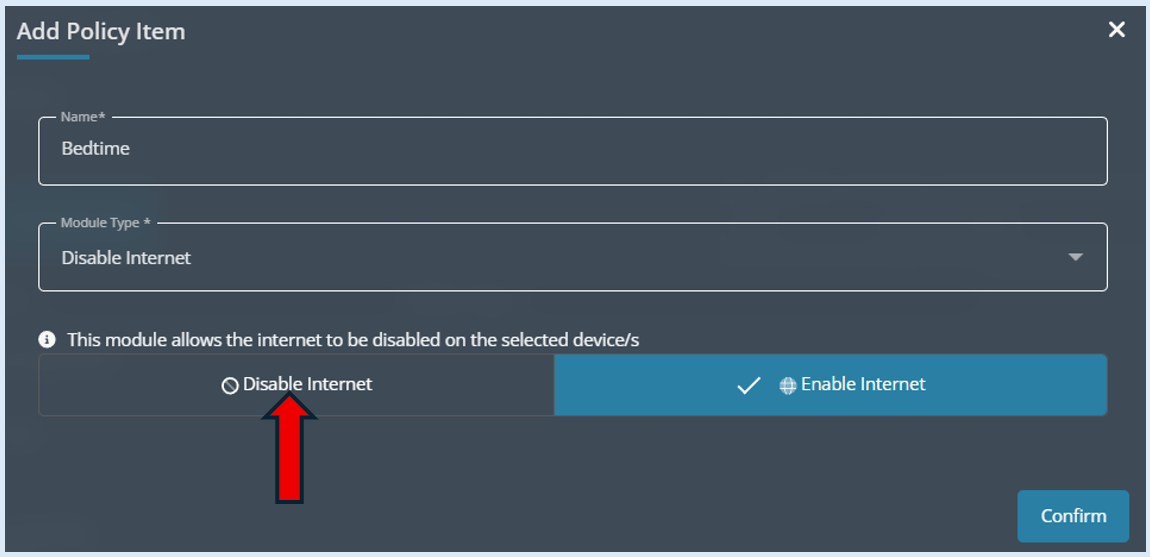
The ‘Disable Internet’ button will turn blue. Select the ‘Confirm’ Button.

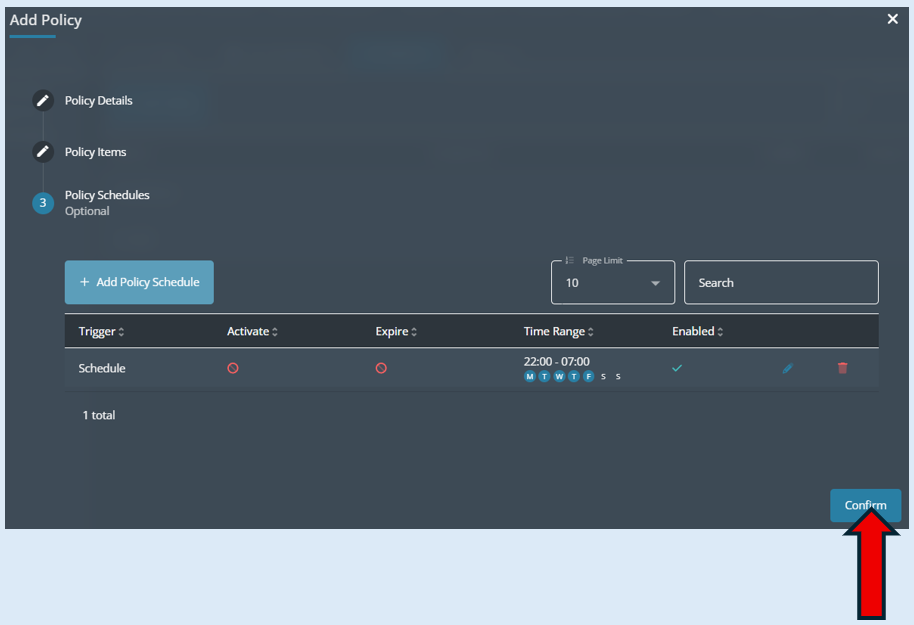
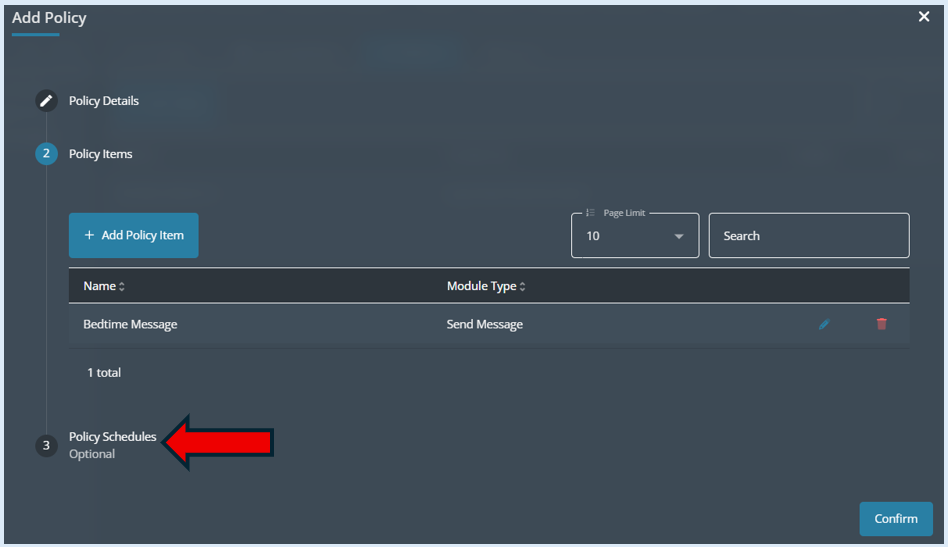
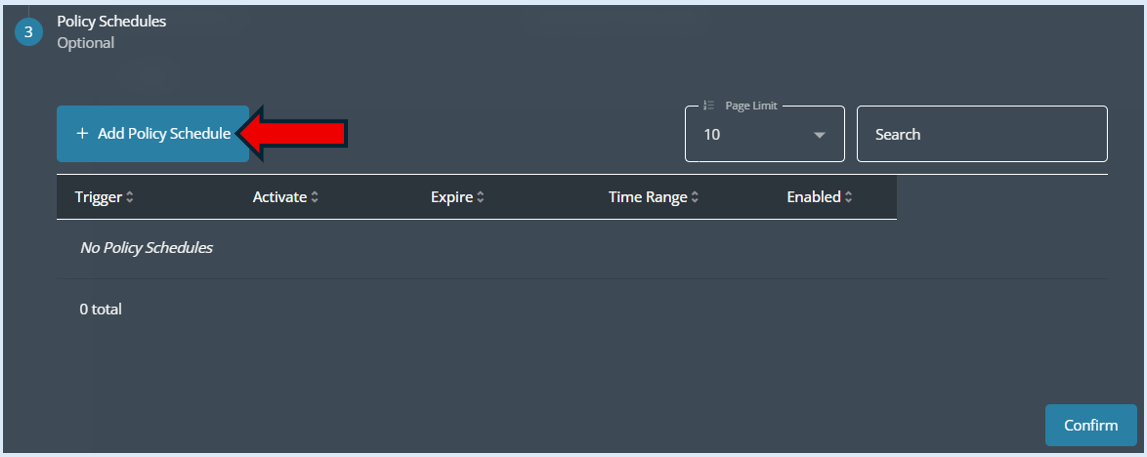
Next select ‘Policy Schedules’.
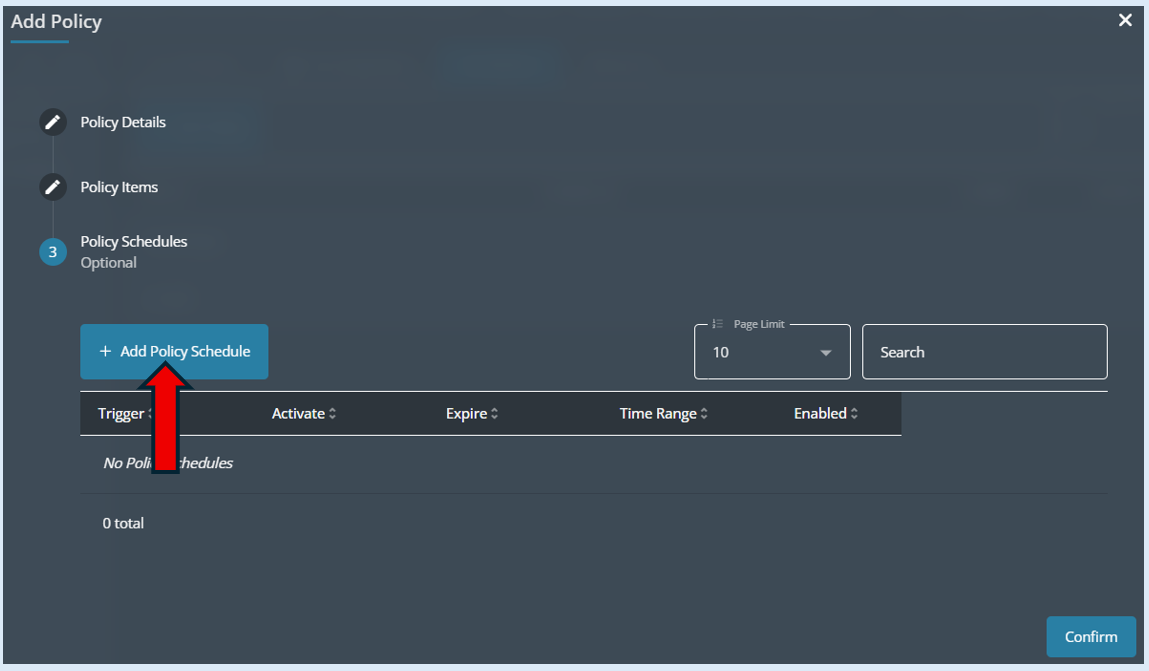
Select ‘Add Policy Schedule’.
The first change to the default settings that you need to make are in the ‘Start Time’ and ‘End Time’ fields. For this example, the times would be set for the internet to be switched off between 10.00pm and 7.00am. The second change would be to deselect the days that you don’t want the policy to run on. For this example, I only want the policy to work Monday to Friday so I would click on both Saturday and Sunday to deselect these two days.
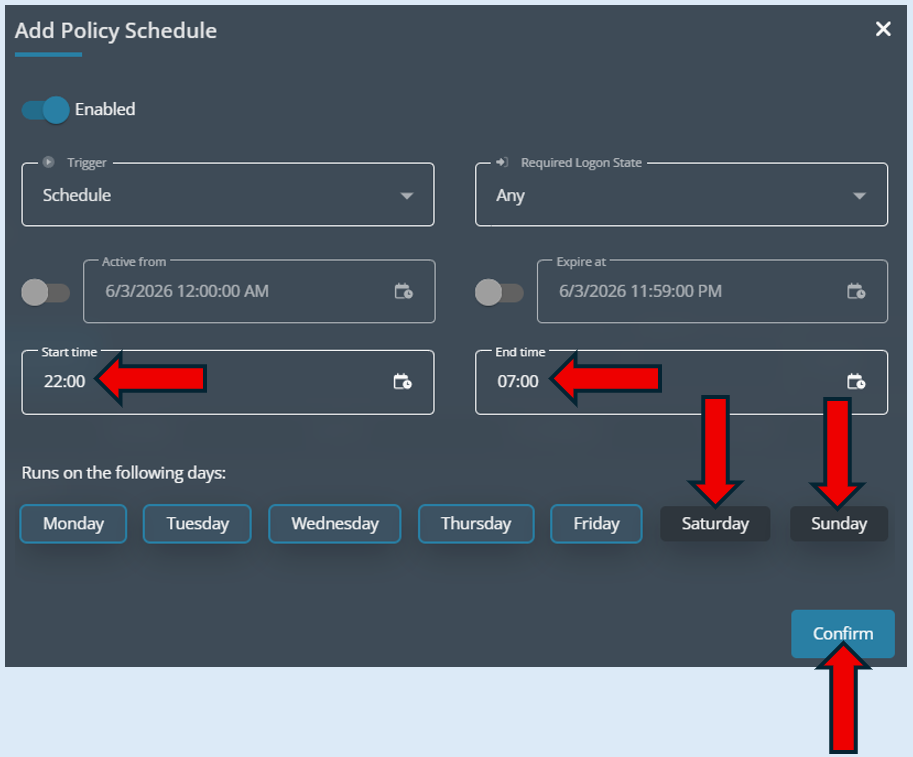
Then select the ‘Confirm’ button.
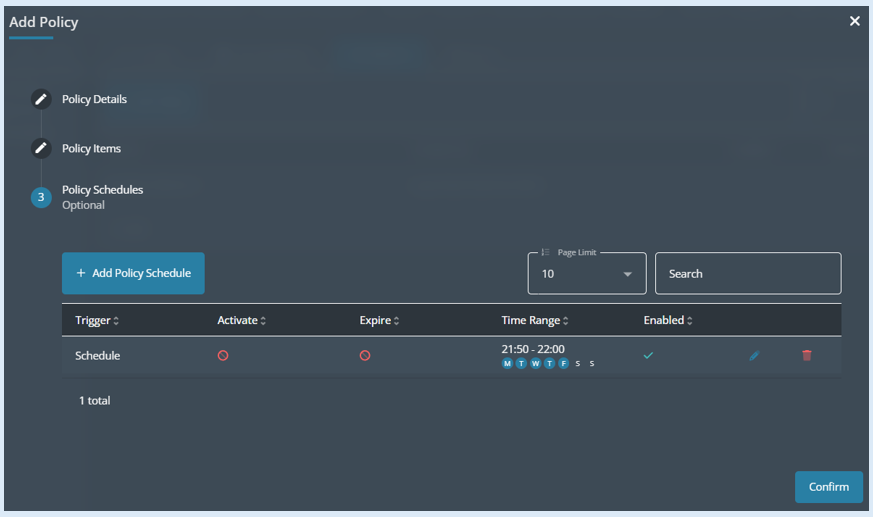
You will then see an overview of the policy, select ‘Confirm’.
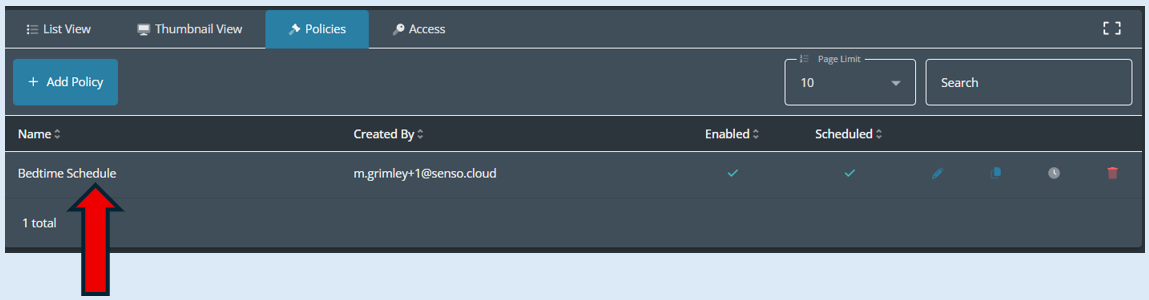
You will now see the policy has been created.
What you can also do is create a second policy to run alongside the first policy to provide a scheduled message sent each day the policy is running that will let the user know that the internet is scheduled to be disabled.
You will need to repeat the same process as explained above. Select your group and then select the ‘Policies’ button.
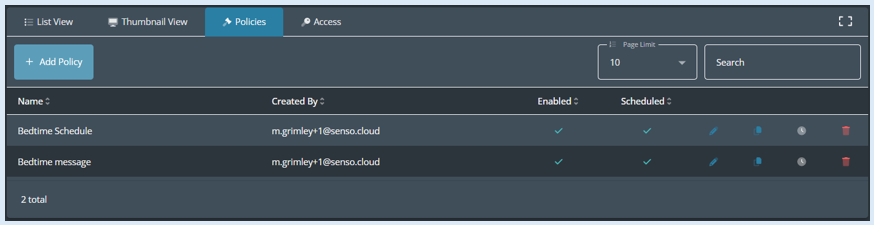
Any policies previously created against this group will now be visible so you will see the ‘Bedtime Schedule’ policy that has been created.
Select ‘Add Policy’.

Add in the policy name.
Select ‘Policy Items’.

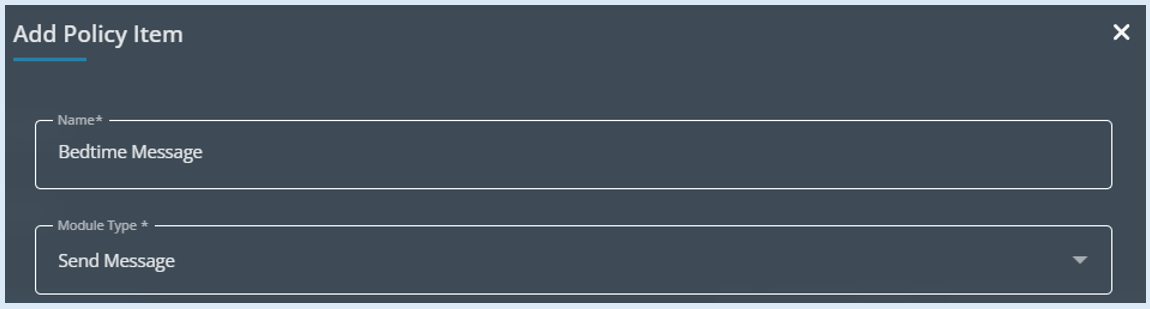
Select ‘Add Policy Item’.
Add in the name for the policy item and select ‘Send Message’ in the ‘Module Type’ field.
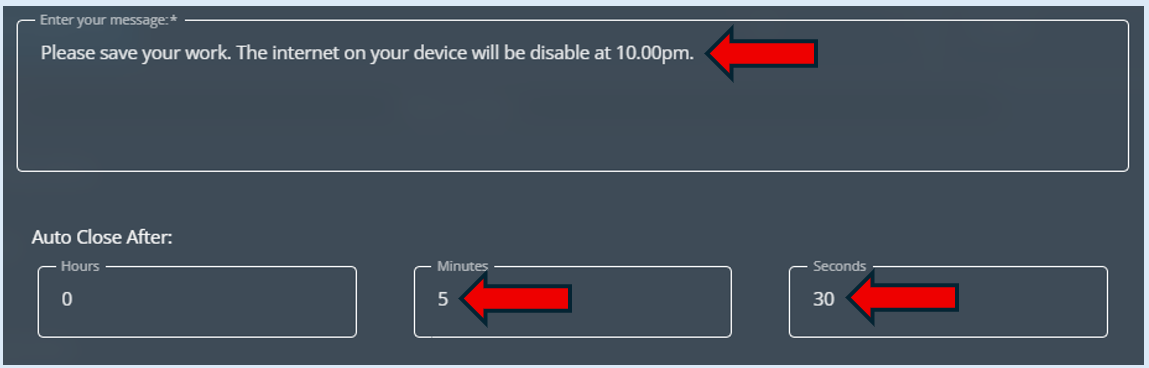
Then you can add in the message that will be sent to the users within the group and select how long this message will stay visible for.
Select the ‘Confirm’ button.
Select ‘Policy Schedules’.
Select ‘Add Policy Schedule’.
From the default settings change the ‘Start Time’ to 21.50 and change the ‘End Time’ to 22.00 and finally deselect Saturday and Sunday.
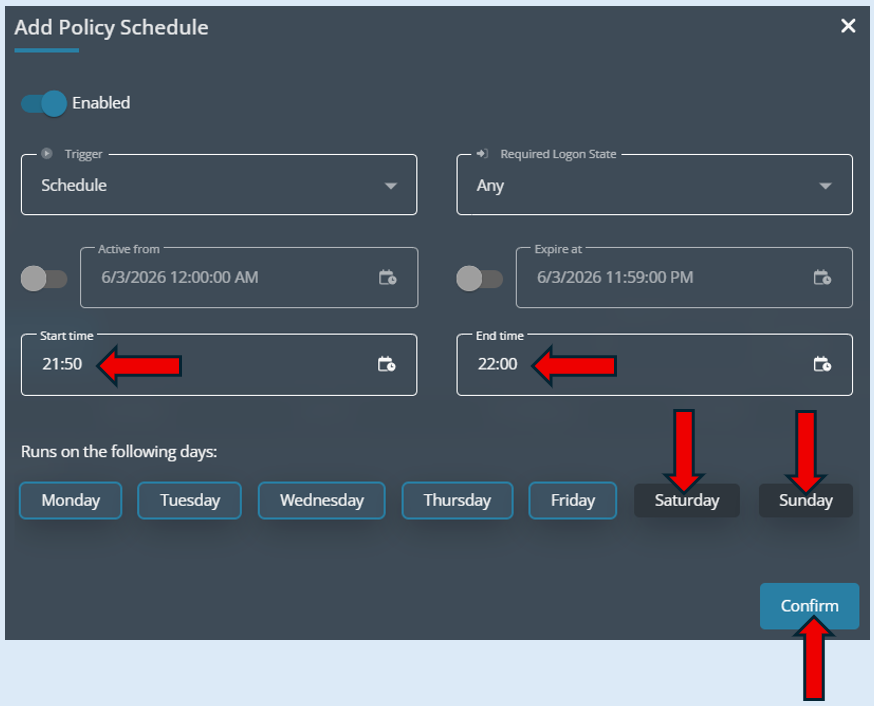
Click ‘Confirm’.
This will then show you an overview of the policy. To complete the process, select ‘Confirm’.
You will now see both of the policies that have been created against the group.
Each day from Monday to Friday a message will be sent to all of the devices in the group explaining the internet will be disabled at 10.00am and then the Internet at 10.00am will be disabled.