
This guide will help you create a ‘Role’ which can be used/assigned to your teaching staff which will allow them to access the ‘Technical Console’. The settings in this guide are what we recommend however you will be able to amend accordingly to your specific needs if required.
Once you have logged in to senso.cloud you will need to select the ‘Admin Centre’ icon. This is located at the top of your console.

Once selected the ‘Admin Centre’ homepage will open.
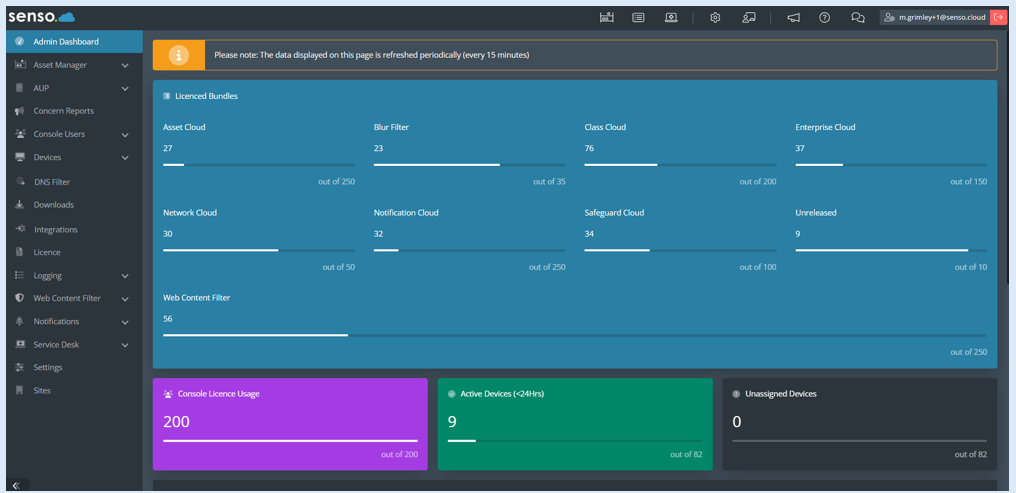
PLEASE NOTE – When creating the new role, at the bottom of each page there is a ‘Confirm’ button'. If selected this will save your work up to that point and close down the ‘Add Role’ creation process. You will be able to locate this role and complete the process by selecting the ‘Edit’ icon.
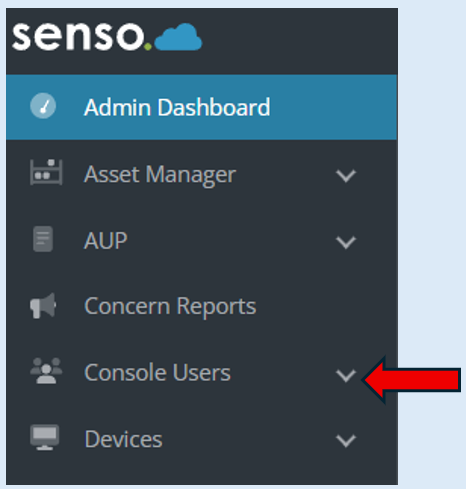
Select ‘Console Users’.
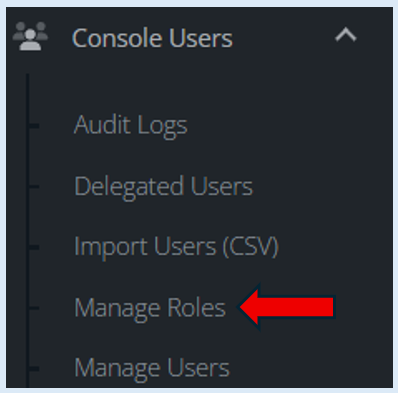
Then select ‘Manage Roles’.
Select ‘Add Role’.
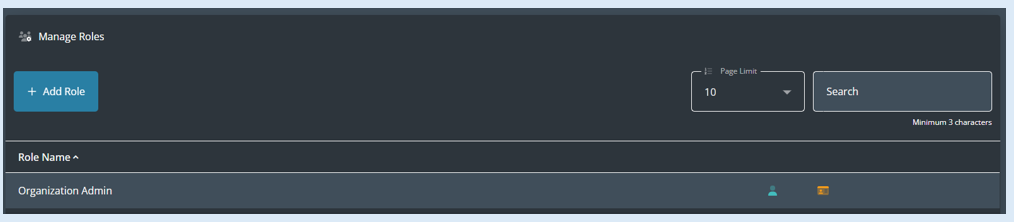
A new box will open. This current tab is called ‘General’.
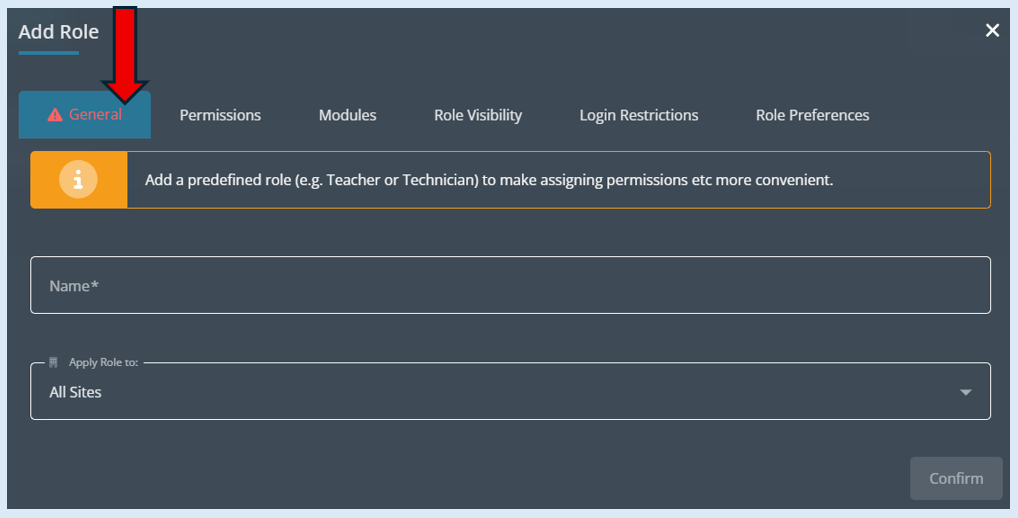
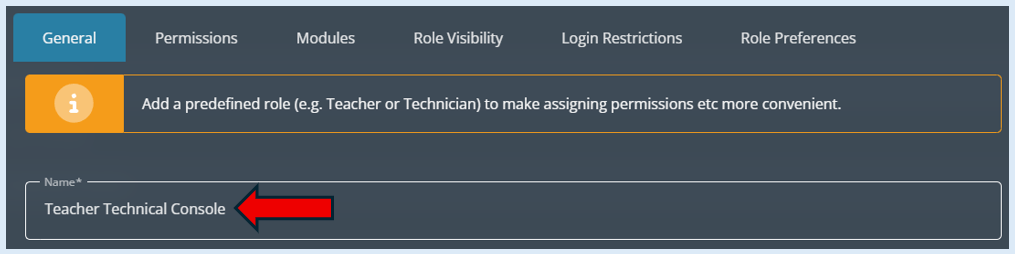
Add in a name for the role. We recommend ‘Teacher Technical Console’.
The next field is deciding where the permissions will be assigned to.
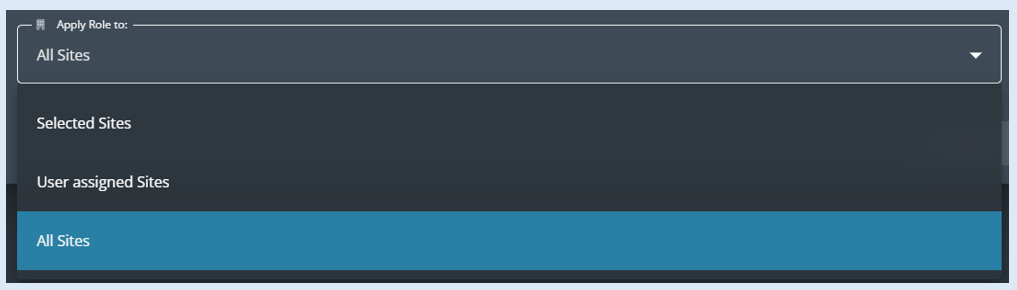
The option that is selected here will be dependent on your set up. These are our generic recommendations.
If you are a single School Portal select ‘All sites’
If you are a trust you can select either ‘Selected Sites’ or ‘User Assigned Sites’. The difference being ‘Selected Sites’ would involve you having to create a role for each individual site where ‘User Assigned’ allows you to use this role against any site. We would recommend ‘User Assigned’ if you are a trust.
Select the next tab which is ‘Permissions’.
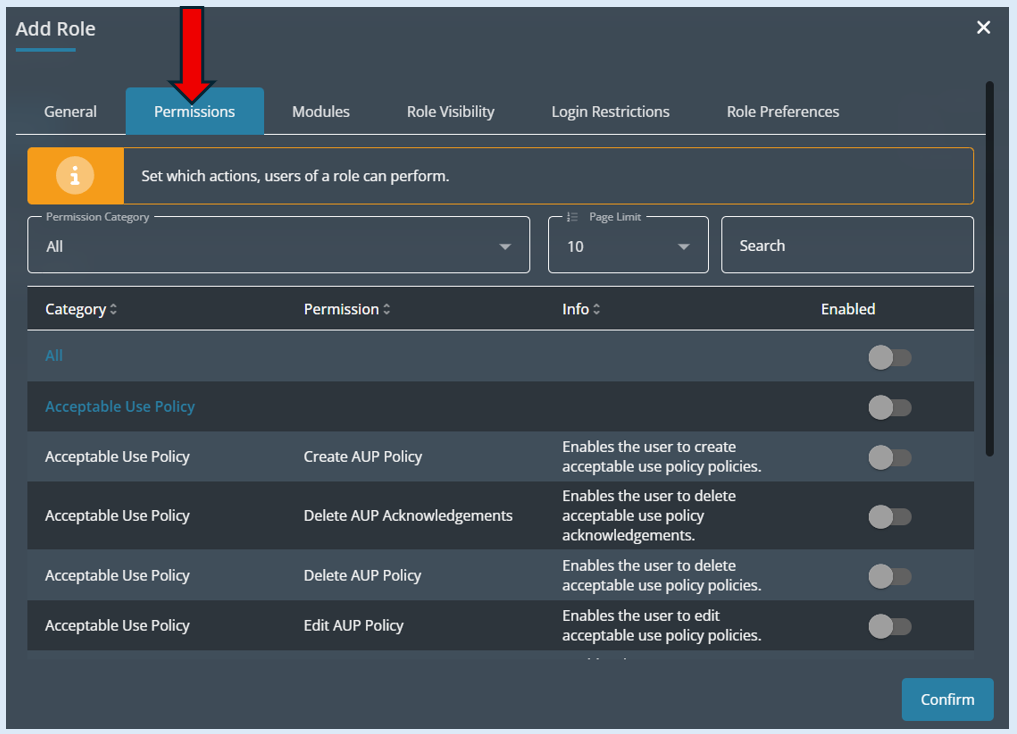
In this section you can give access to the ‘full group tree’ basically the whole group structure but we find it is usually the case that a teacher’s groups will be defined by Teams Integration or Class integration so no option will need to be selected.
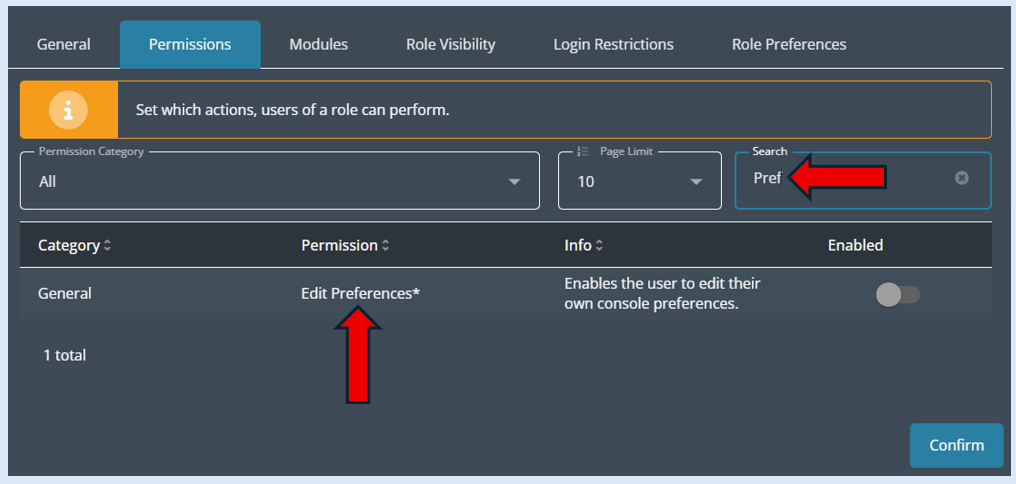
However, this page will allow you to switch the ‘Preferences’ module on if required. This means that a teacher will be given access to change between the Lite and Technical consoles. If you want to set the Technical Console as the default and not allow it to be changed, then no option needs to be selected.
If you do want to provide the option to change between consoles, type ‘Pref’ in the ‘Search’ field, it will automatically search for this option.
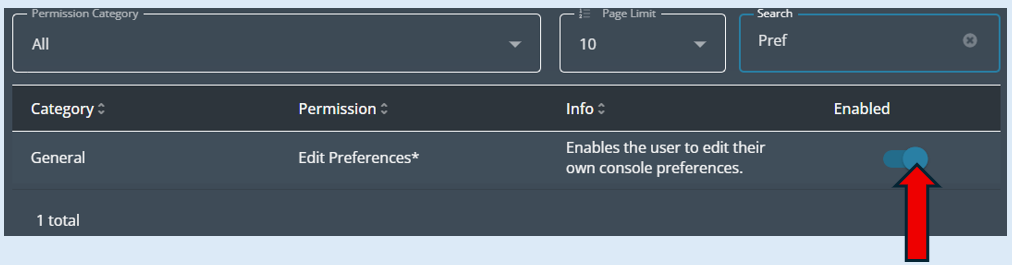
Turn the ‘Enabled’ option to the ‘On’ position.
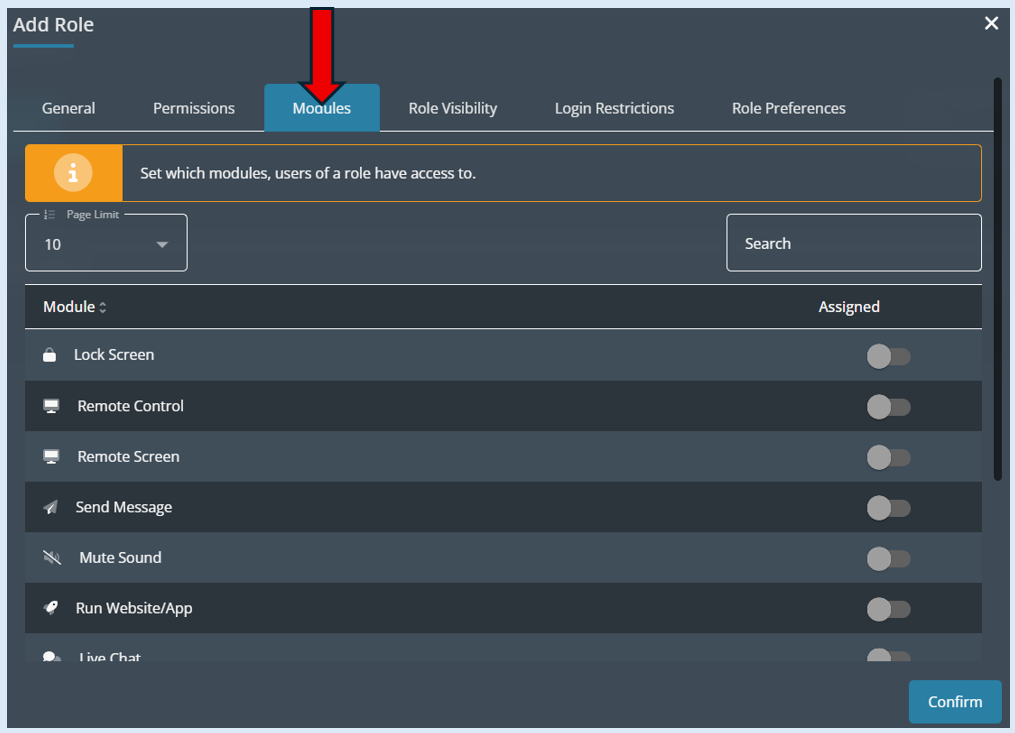
The next tab is called ‘Modules’. This is where we can switch on the modules that you would like the teacher to be able to access within the Technical Console.
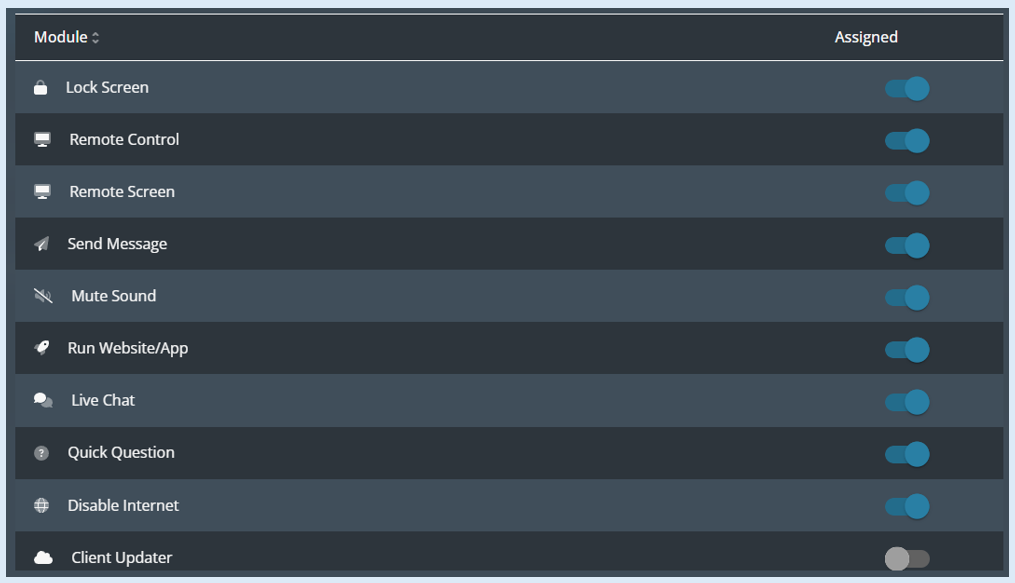
Our recommendation would be to switch on all of the teacher-based modules and if you have purchased the ‘Scenes’ module also enable this. Please see screenshots below to see the modules that we recommend switching on
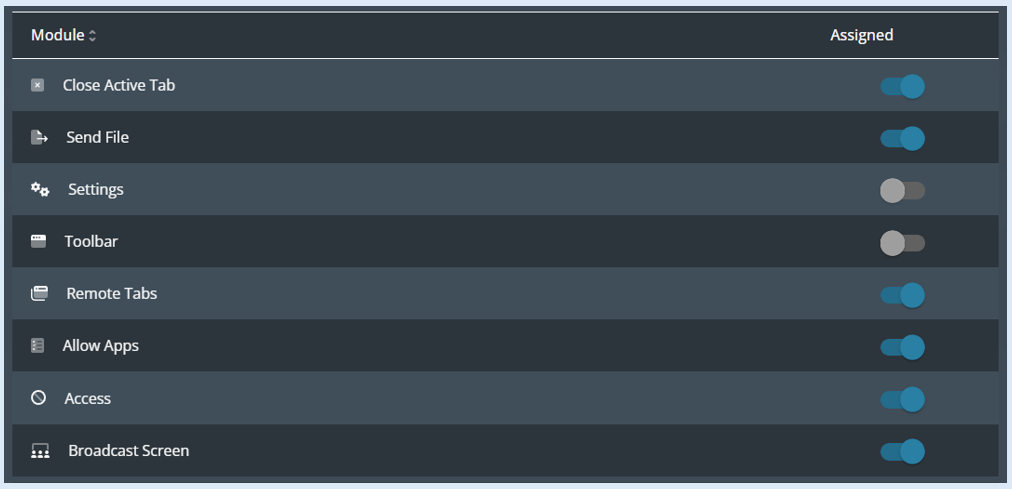
The next tab is ‘Role Visibility’.
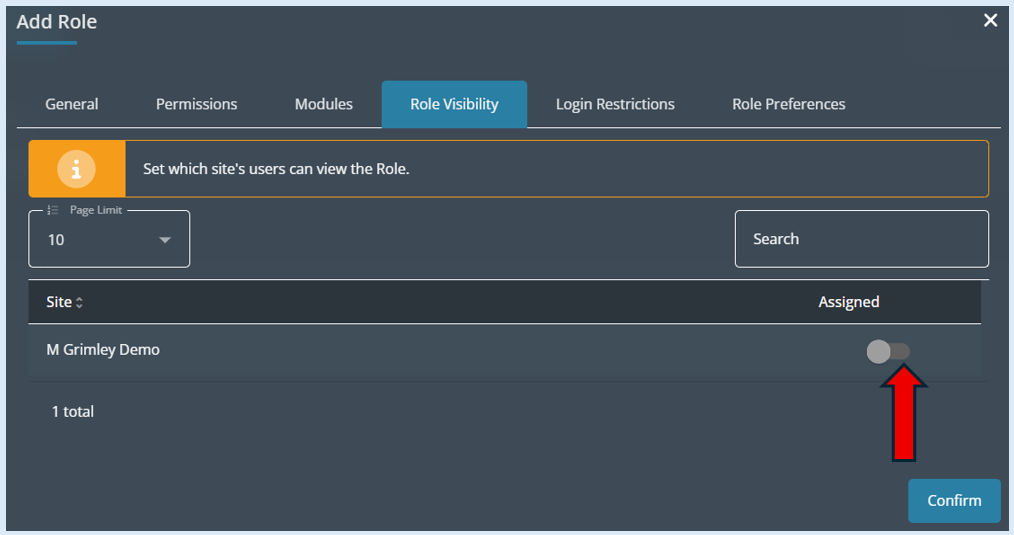
This page allows you to determine which site this role will be visible to. If you have multiple sites, they will all be listed and you have the option to toggle each site to the ‘On’ position.
The next tab is ‘Login Restrictions’.
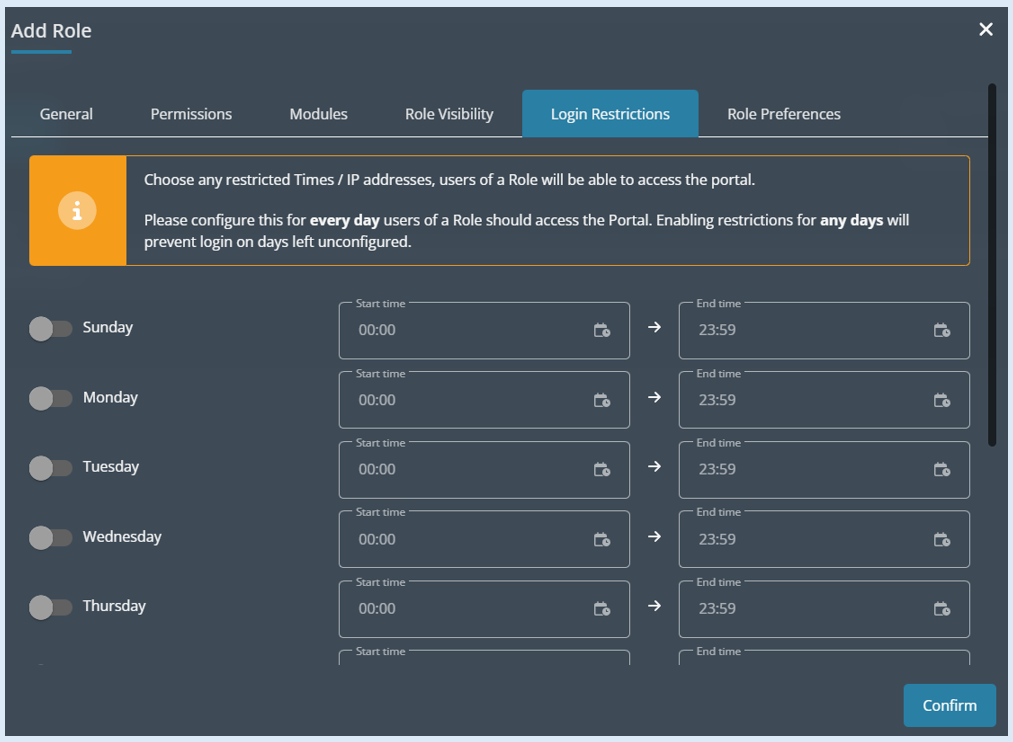
This will allow you to add in any restrictions on the times a teacher/user can access the system.
For example, you do not want your teachers to access the system during the weekend, you would disable both Saturday and Sunday by leaving the toggle in the ‘Off’ position. For Monday to Friday, you would enable the toggle switch to the ‘On’ position.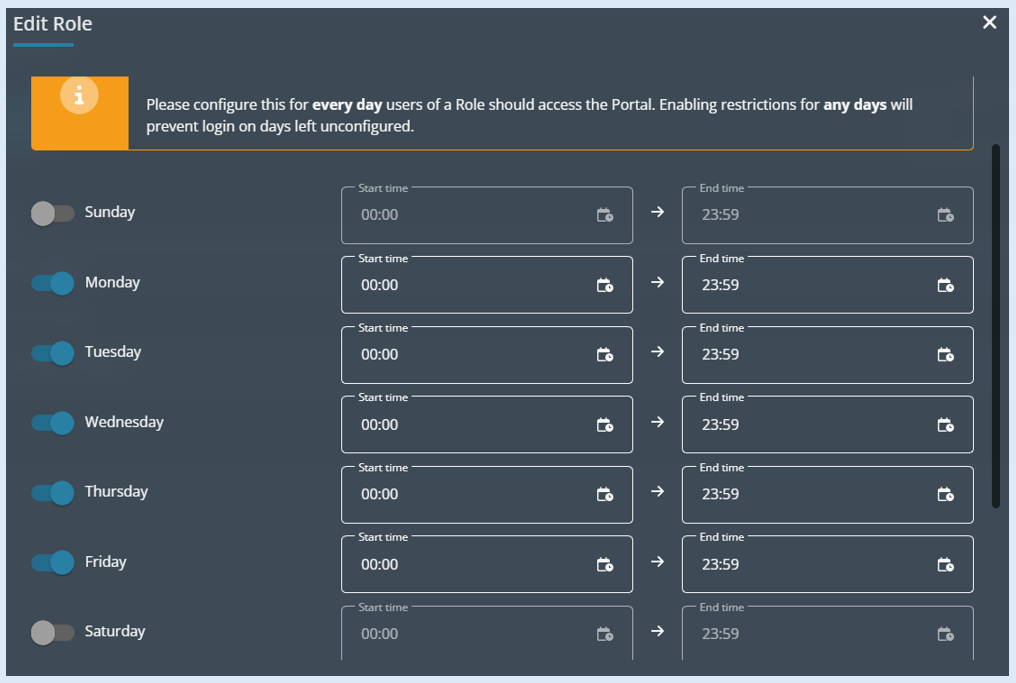
Please note - If no changes are made on this page, it means that users can access the system 24/7, 7days a week.
On this page you will also be able to restrict IP addresses.
Your IP address will automatically show to make you aware of what it is.
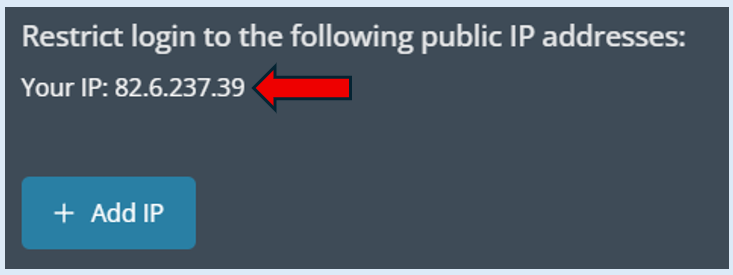
If we make no changes at this point, there will be no restrictions linked to IP addresses.
If you do wish to place restrictions, select the ‘Add IP’ button.
Two new fields will open; these will allow you to enter in the Start IP and End IP addresses. If you do not have an ‘End’ IP number, you will need to put the same IP address in both fields.

The IP address that you have added in will work alongside the times you have previously set. So using the example above (If you add in the Schools IP address) it will only allow users who are using this IP address at the times that have been set (Monday to Friday) to access the system. No user will be able to access the system from any other IP address.
If you do require other IP addresses to access the system, then add them in the same way as the process that has just been explained and these IP addresses will be able to access the software.
The final tab is called ‘Role Preferences’.
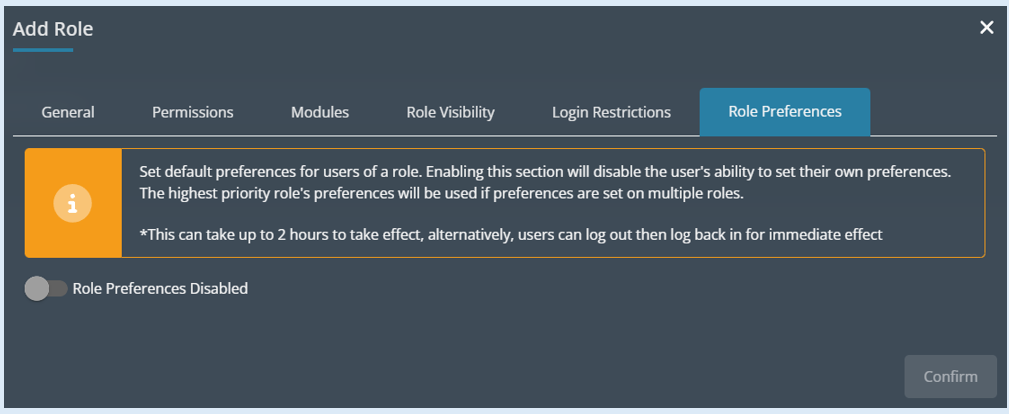
Toggle the ‘Role Preferences Disabled’ button to the ‘On’ position.
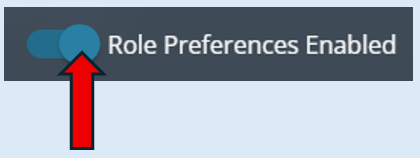
The ‘Role Preferences’ options will then open.
This is where you decide on the default settings for the role that is being created.
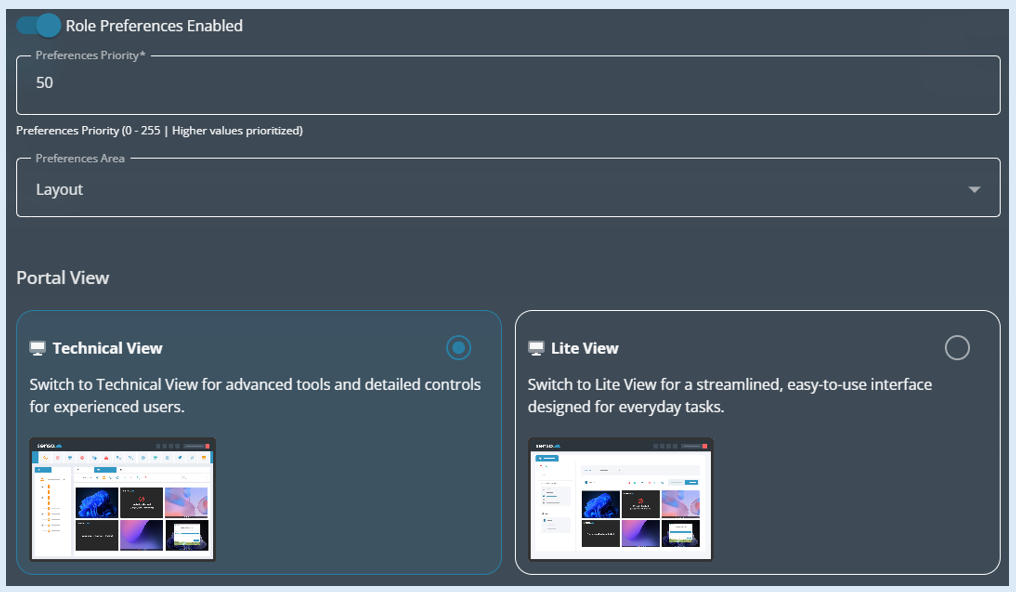
The first recommendation we would suggest is to change the ‘Default Thumbnail Title’. To do this select the down arrow on the ‘Preferences Area’ field.

Select ‘Module’.
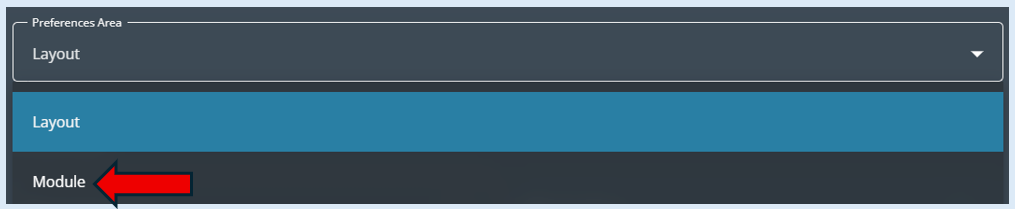
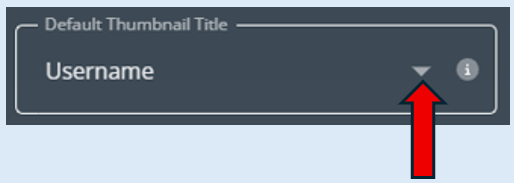
This will then open additional options.
Select the down arrow in the ‘Default Thumbnail Title’ field.
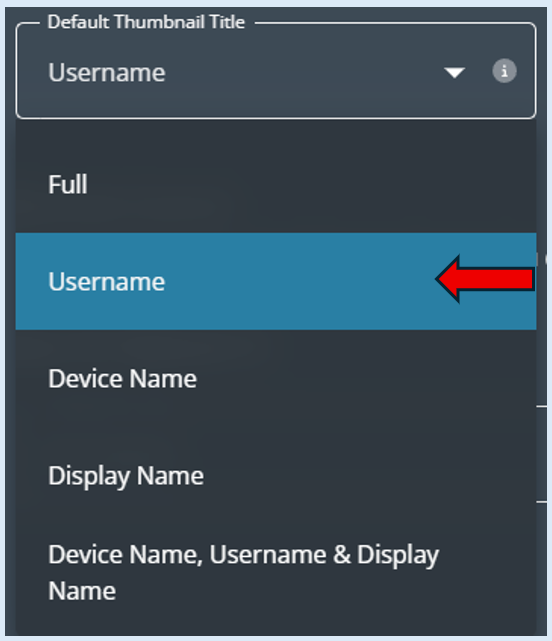
Then select ‘User Name’. This will then show the students name on the thumbnails when viewing the student devices from your console rather than seeing a device number.
Next, it is really important to tick the ‘Technical View’ option.
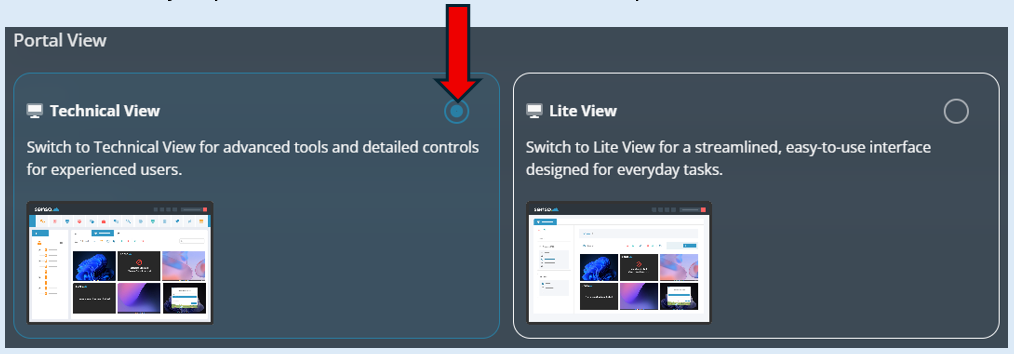
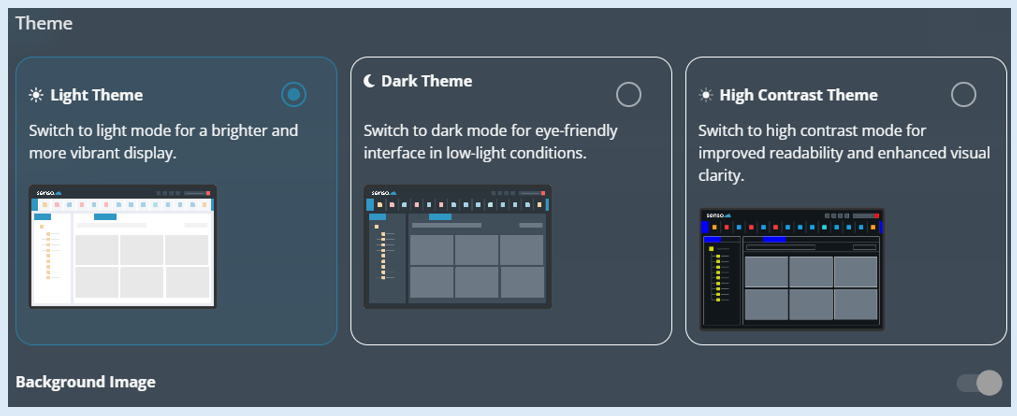
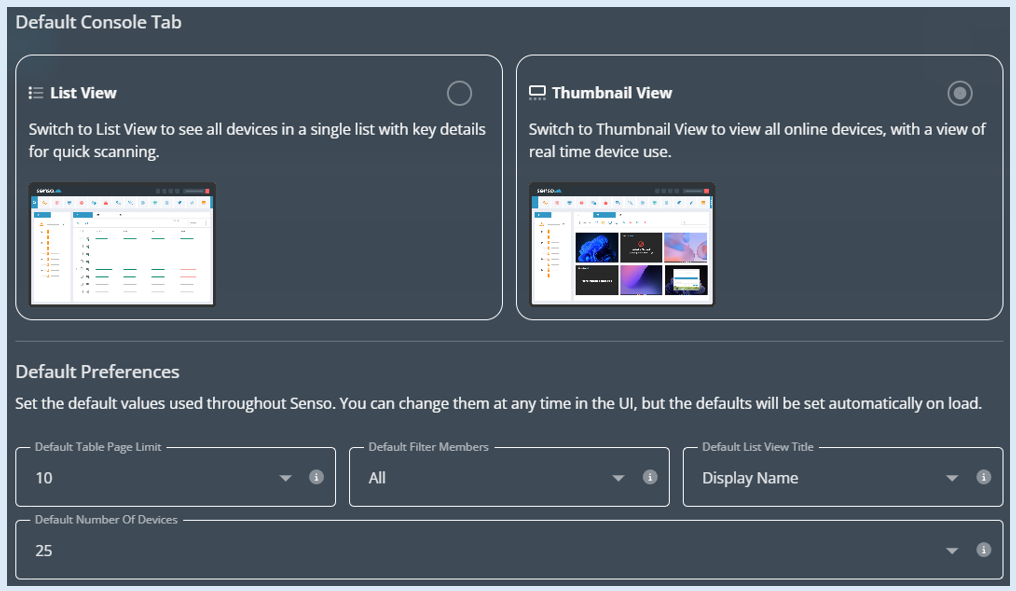
You can also change any of the other default settings if you wish to.
Finally select ‘Confirm’.
The role has now been created and will show in the ‘Role Name’ list.
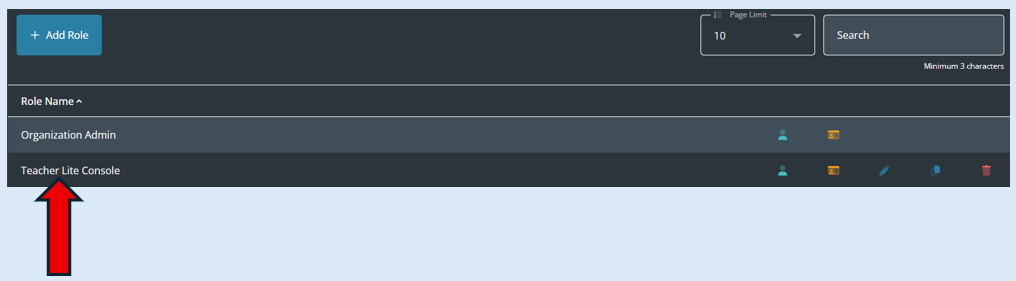
This role can now be assigned to users.