
This guide will allow you to request files from selected users within a group. These files will then be sent back to the console user who can download and save them.
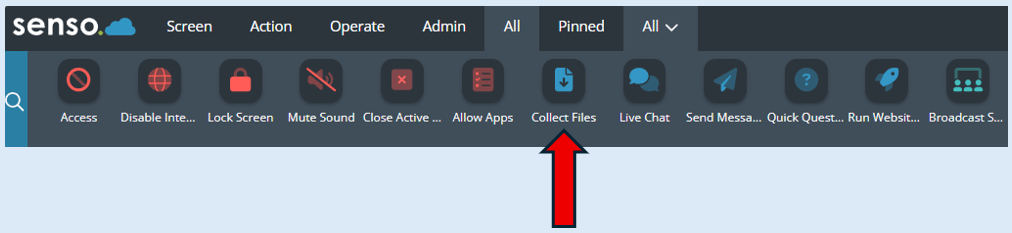
Once you have logged in to your console, you will need to select the ‘Collect Files’ icon which will be located on your functionality dashboard.
(Please note this bar is customisable and your icon could be in a different position)
Once selected the module options will open on the left-hand side of your console.
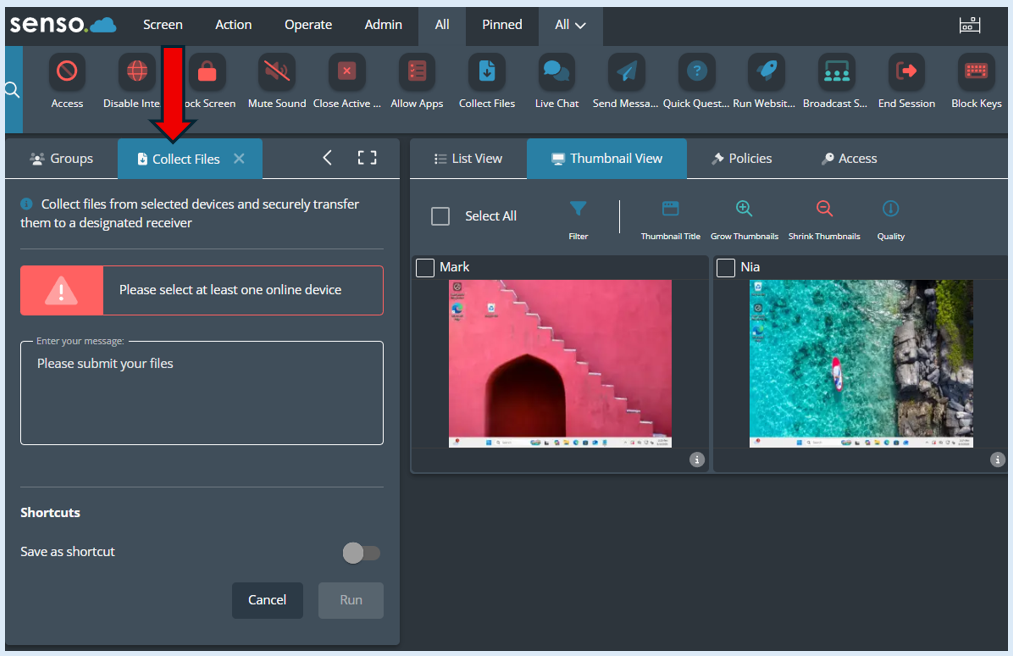
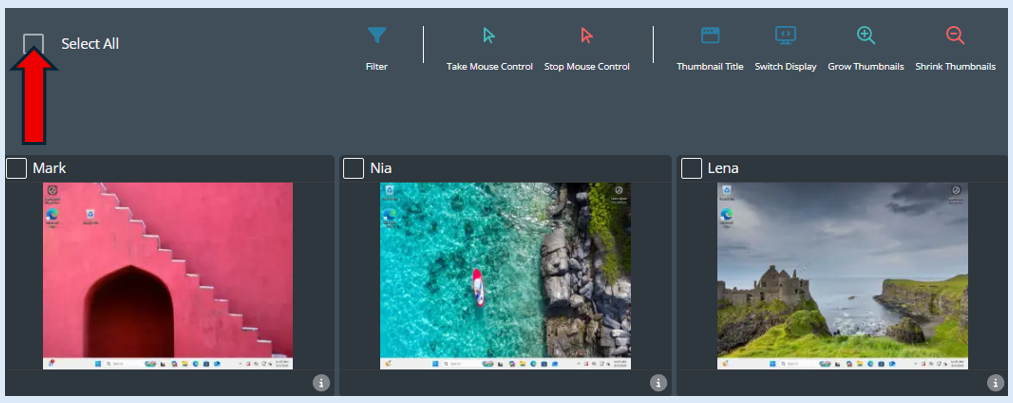
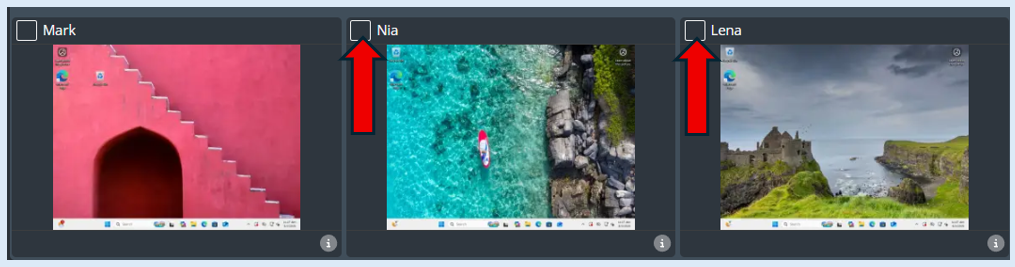
The first step is to select which users/devices you are asking for a file to be collected from. If it is all of the users/devices within the group, select the ‘Select All’ option.
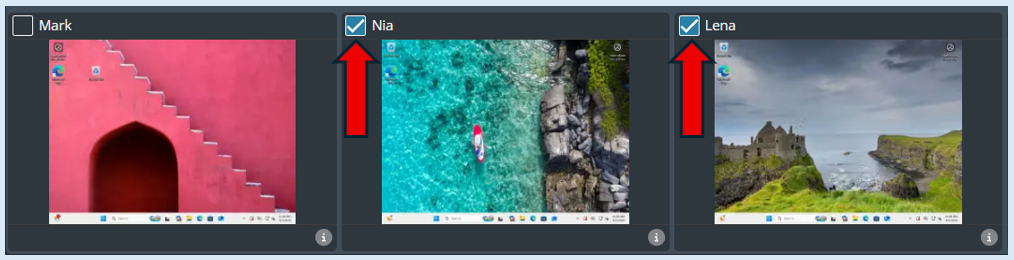
Once selected all of the devices will show a blue tick.
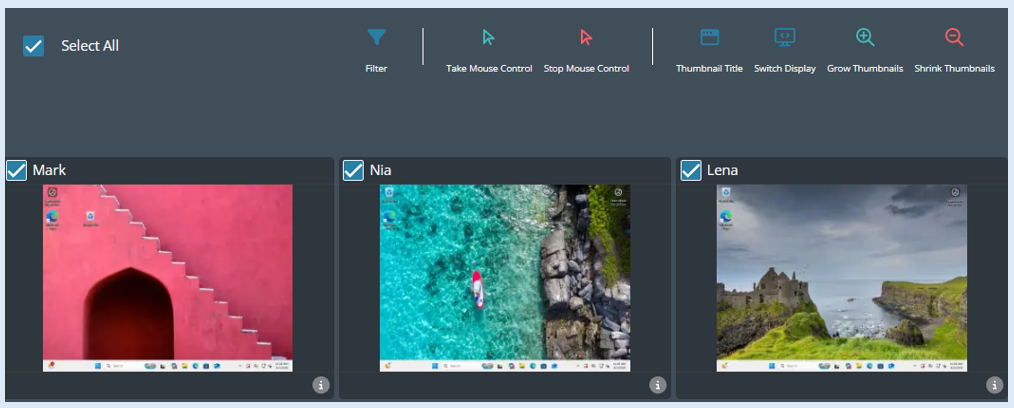
Alternatively, you can select the specific users/devices you require a file from by ticking the thumbnail.
Next you can add in the message that will be sent to the users requesting a file download, this is optional as there is a default message that appears for you to use.
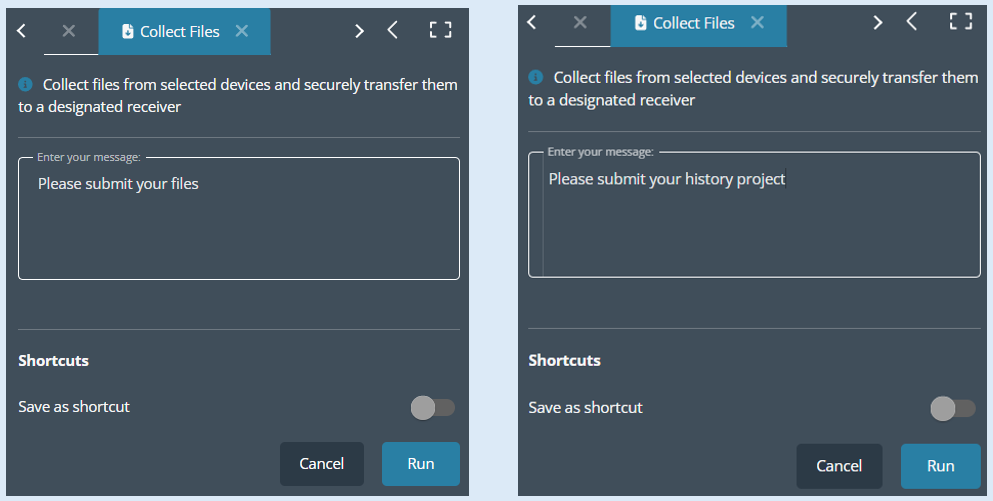
Default message Custom message
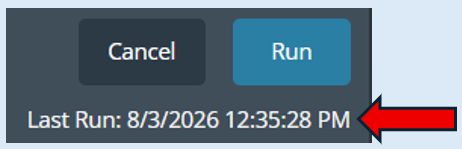
All you need to do now is select ‘Run’.
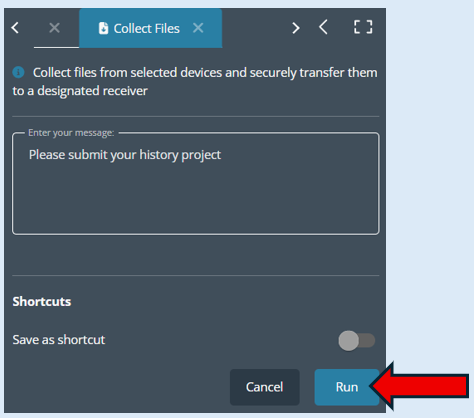
Once selected a log will appear under the ‘Run’ button.
The message that you set up will now appear on each user’s device.
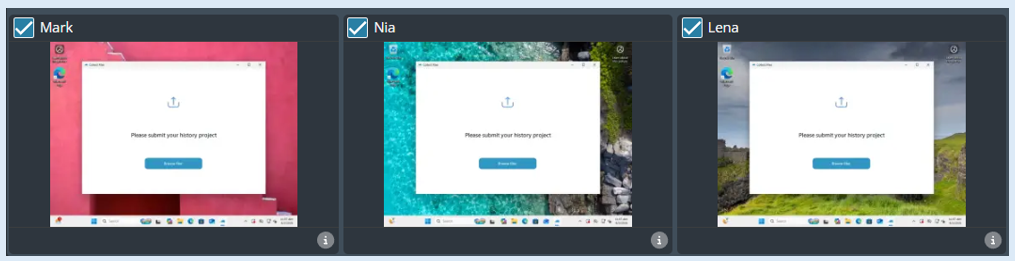
There is also a countdown timer allowing the user to see how long they have to upload their file. This is et to 5 minutes. The user will also get a reminder pop up notification when the timer reaches 1 minute.
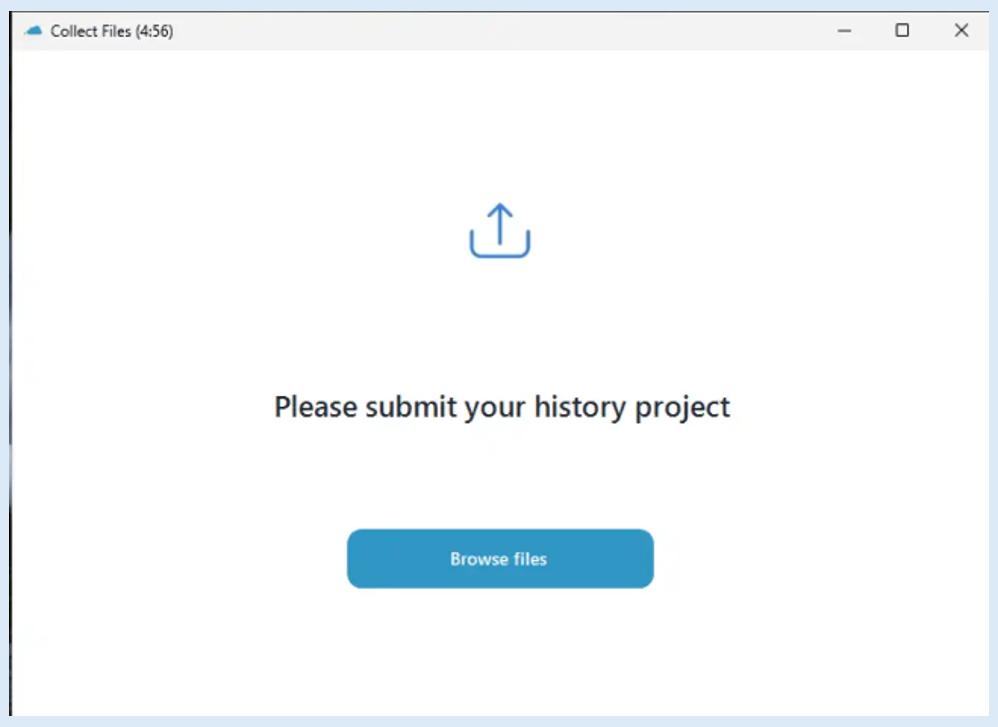
The user will need to select the ‘Browse Files’ button.
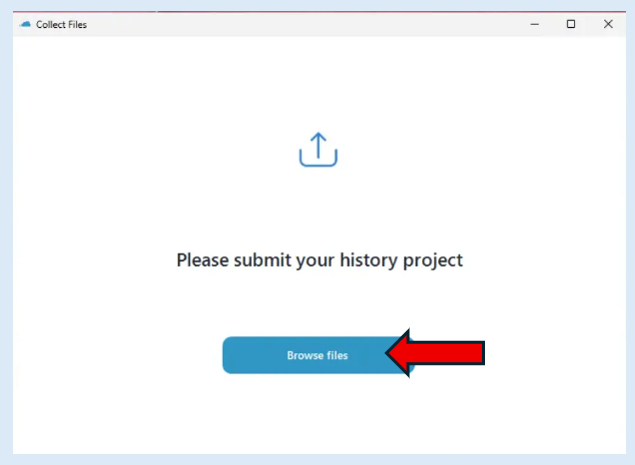
This will direct the user to their ‘Documents Folder’ to select the file that has been requested.
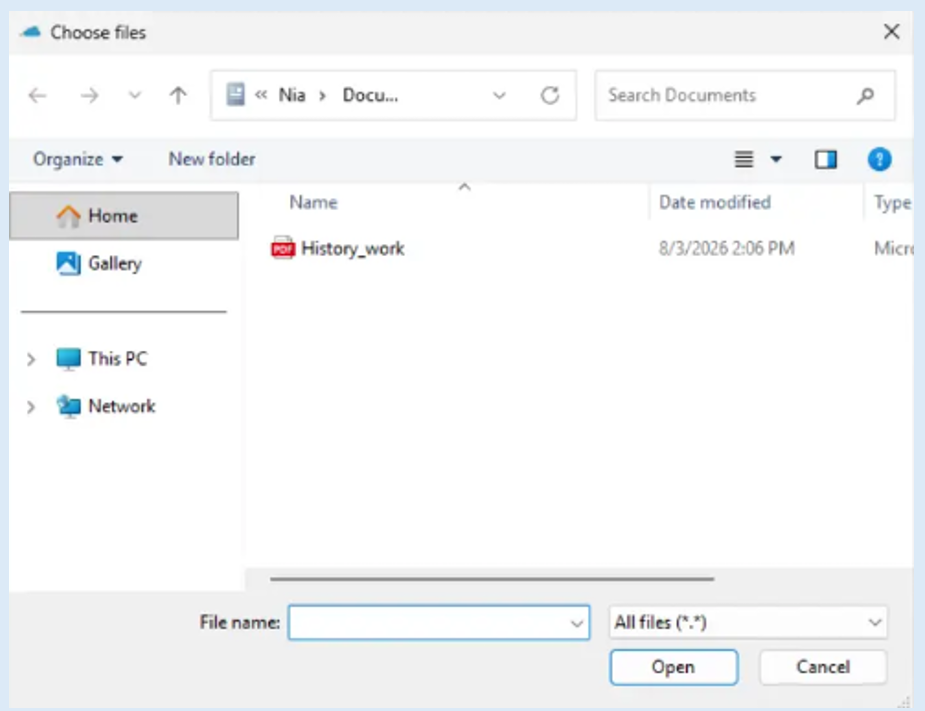
The user will select the file, this will then show the selected file.
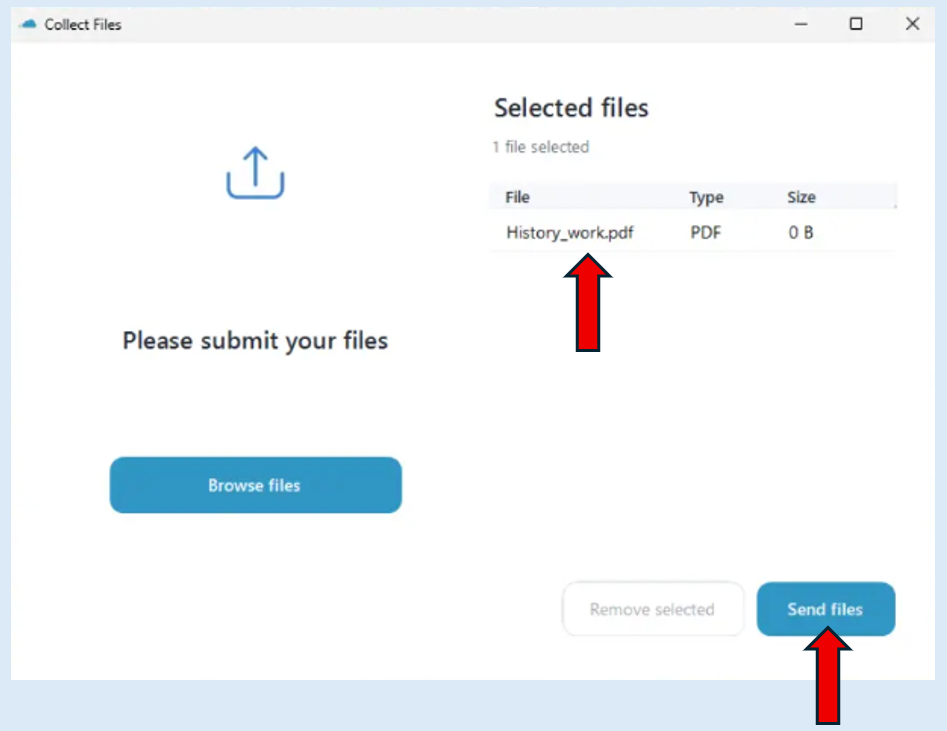
The user will now need to select the ‘Send Files’ button.
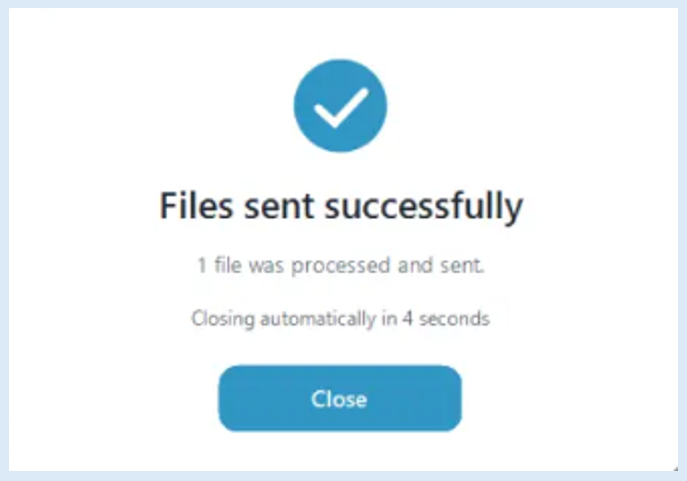
A pop-up message will then appear confirming the action.
Now the file has been sent you will notice it is recorded at the bottom of the module options. The file will automatically add the users name to the start of the file name.
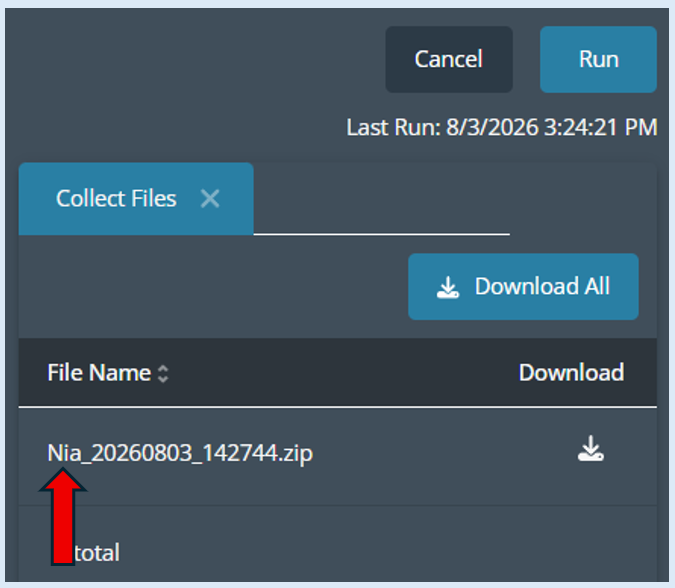
As each user uploads their file it will appear in this list.
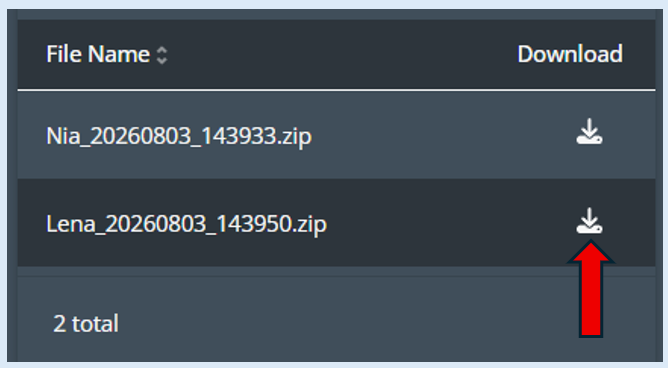
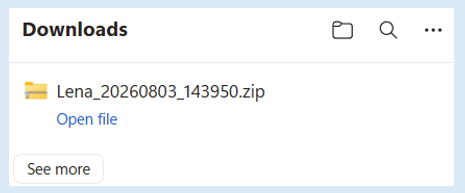
The console user can now download each files by selecting the ‘Download icon’. This will open an additional pop-up box. This will place the file in your ‘Downloads’ folder.
Supported file types
• Documents: PDF (.pdf), Microsoft Word (.doc and .docx), OpenDocument Text (.odt), Rich Text Format (.rtf), and EPUB eBooks (.epub)
• Spreadsheets: Microsoft Excel (.xls and .xlsx), OpenDocument Spreadsheet (.ods), CSV (.csv), TSV (.tsv), and Apache Parquet (.parquet)
• Presentations: Microsoft PowerPoint (.ppt and .pptx) and OpenDocument Presentation (.odp)
• Plain text and academic files: Plain text (.txt), Markdown (.md), LaTeX (.tex), BibTeX (.bib), and Jupyter Notebook (.ipynb)
• Web and data files: JSON (.json), XML (.xml), YAML (.yaml and .yml), HTML (.html), CSS (.css), JavaScript (.js), and TypeScript (.ts)
• Source code files: C# (.cs), Java (.java), Python (.py), C (.c), C++ (.cpp), SQL (.sql), R (.r), and MATLAB/Objective-C (.m)
• Images: JPEG (.jpg and .jpeg), PNG (.png), GIF (.gif), SVG (.svg), WebP (.webp), and TIFF (.tif and .tiff)
• Audio: MP3 (.mp3), WAV (.wav), M4A (.m4a), AAC (.aac), FLAC (.flac), and OGG (.ogg)
• Video: MP4 (.mp4), QuickTime video (.mov), WebM (.webm), AVI (.avi), and MKV (.mkv)
• Compressed and archive files: ZIP (.zip), 7-Zip (.7z), TAR (.tar), and GZIP (.gz)
• CAD and 3D files: Drawing E